Barn Door Hardware Buying Checklist: 15 Questions Before You Purchase
A 180-pound reclaimed wood door ripping an entire track system from the wall, leaving a jagged hole in drywall and repair bills exceeding $1,200. The cause? Hardware rated for 150 pounds supporting a door that weighed 30 pounds more than its capacity.
Barn door hardware failures aren't just inconvenient—they're expensive, dangerous, and completely avoidable. After analyzing hundreds of installation disasters, professional installer insights, and manufacturer specifications, these 15 critical questions separate successful barn door projects from costly nightmares.
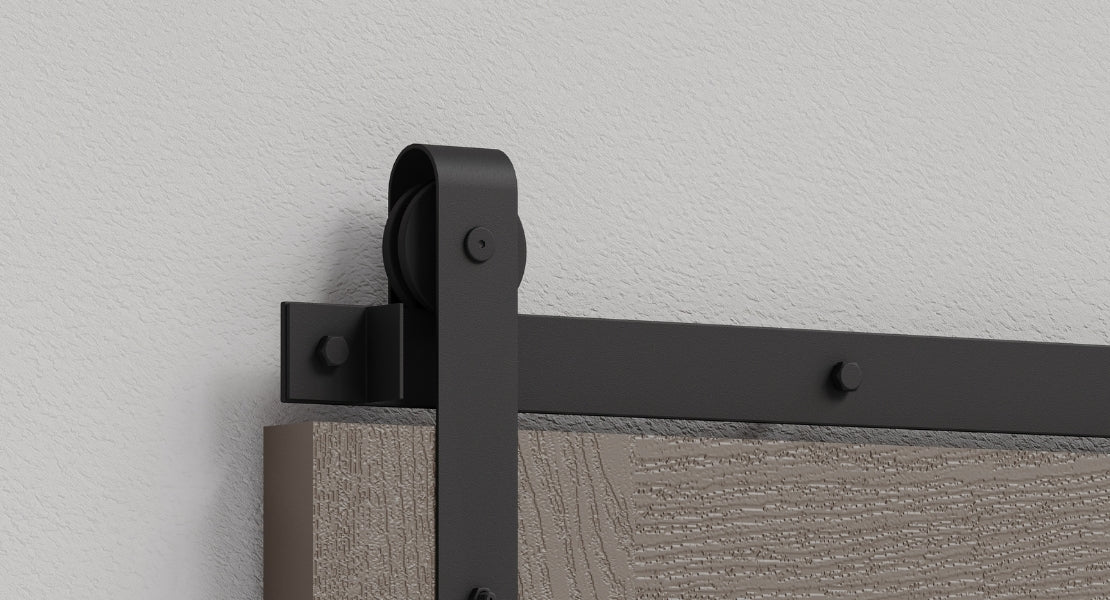
1. What's My Door's Actual Weight (Including All Hardware)?
![]()
Your door's actual weight determines everything else about your hardware selection, yet 70% of buyers calculate incorrectly.
This isn't about estimating—it's about precise calculation, because being off by even 20 pounds can lead to catastrophic failure.
Calculate your door's true weight systematically: Start with the door material and dimensions. Solid wood weighs 3-4 pounds per square foot, reclaimed wood often weighs 4-5 pounds per square foot, and engineered doors typically weigh 2.5-3 pounds per square foot. A standard 36" × 84" solid pine door weighs approximately 150 pounds before adding any hardware.
Add all components: handles (2-5 pounds), decorative hardware (3-8 pounds), and glass panels (6-12 pounds per square foot). Many homeowners underestimate door weight by focusing only on the door panel while forgetting additional components.
One installation failure involved a "lightweight" door that actually weighed 240 pounds after adding wrought iron handles and decorative elements. The 200-pound capacity hardware failed within six months, requiring complete replacement and wall repairs.
Professional standard: Always add a 30% safety margin to the calculated weight. If your door weighs 200 pounds, shop for hardware rated for at least 260 pounds. This safety buffer accounts for dynamic forces during operation and prevents premature failure.
2. Does My Hardware Capacity Include a Safety Margin?
Hardware weight ratings aren't maximums—they're operational limits that shouldn't be approached without safety margins. Professional installers report that exceeding 75% of rated capacity leads to accelerated wear and potential system failure.
Safety margin calculation: Hardware rated for 300 pounds should carry doors weighing no more than 200-225 pounds for reliable long-term operation. This extra capacity absorbs stress from daily use, temperature changes, and building settlement that gradually weaken mounting points.
Different track systems handle weight through distinct approaches. Top-mount flat track systems distribute weight through hangers bolted to the door face, limiting capacity to 400-600 pounds even with premium components.
Box rail systems use enclosed tracks that support significantly more weight—up to 1,200 pounds for heavy-duty models—through superior engineering and weight distribution.
Budget hardware often inflates capacity ratings without adequate testing. Quality manufacturers publish testing results showing their hardware performing 225,000 feet of travel—equivalent to 30+ years of daily use.
Companies avoiding these specifications likely haven't invested in proper testing.
3. What Track Type Fits My Door Weight and Environment?

Track selection determines both weight capacity and long-term reliability, yet most buyers choose based on appearance rather than engineering requirements. The three main types serve different applications with dramatically different performance characteristics.
Flat track systems work well for interior doors under 300 pounds where exposed hardware complements your aesthetic. These systems cost $150-400 and offer the widest selection of decorative options. However, exposed components require regular cleaning and lubrication to prevent noise and premature wear.
Box track systems prove essential for doors over 300 pounds or any outdoor application. The enclosed design protects moving parts from debris while supporting 400-1,200 pounds through superior engineering. While costing 50-100% more than flat track, box systems justify the premium through decades of reliable operation.
Tube track systems bridge traditional and modern aesthetics while supporting 350-500 pounds. The round profile self-cleans better than flat tracks while maintaining hardware visibility. These systems work particularly well in contemporary settings where flat track seems too rustic but box track appears too industrial.
Environmental conditions dictate track selection more than aesthetics. Outdoor installations require galvanized or stainless steel construction that resists corrosion. High-humidity environments like bathrooms accelerate wear on standard finishes, making sealed box tracks worth their premium pricing.
4. Are My Wall Structure and Mounting Points Adequate?
Wall failures account for more barn door disasters than hardware failures, yet most buyers focus entirely on track selection while ignoring structural requirements. The mounting system must distribute the door's weight plus dynamic forces across multiple wall studs to prevent catastrophic pull-out.
Standard drywall construction requires header boards for any door over 75 pounds.
The header board—typically a 2×6 or 2×8 piece of solid lumber—spans the entire track length and mounts securely into wall studs every 16 inches. This distributes weight evenly rather than concentrating stress at individual mounting points.
Header board installation requires locating and marking all wall studs, pre-drilling to prevent wood splitting, and using appropriate lag bolts that penetrate studs by at least 2.5 inches. Many installations fail because DIYers use shorter screws that don't reach structural framing.
Concrete and masonry walls provide superior strength but require specialized anchors and installation techniques. Professional installers recommend epoxy anchors for concrete applications, as they provide higher pull-out resistance than mechanical anchors. However, concrete installation costs typically run $200-400 more than wood framing due to specialized tools and techniques required.
5. What Are the Complete Dimensional Requirements?

Measurement mistakes cause more project delays and cost overruns than any other factor, yet the requirements differ fundamentally from traditional door installation. Barn doors need specific clearances for proper operation and complete coverage of the opening.
The door must be 1-2 inches wider than the opening to provide privacy when closed. A 36-inch opening requires a 38-40-inch door width. This overlap prevents gaps that compromise privacy, particularly important for bathroom and bedroom applications.
Track length equals door width × 2. A 40-inch door needs an 80-inch track for full opening capability. Shorter tracks prevent complete opening, leaving part of the doorway blocked even when the door is "open."
Ceiling height must accommodate track mounting plus door height plus 2-3 inches clearance. Standard 8-foot ceilings create problems for 80-84 inch doors, often requiring custom shorter doors or raised track mounting that compromises structural support.
Floor clearance proves equally critical. Doors need 1/2 to 3/4 inch ground clearance for smooth operation over carpet or uneven floors. However, excessive clearance creates unsightly gaps and compromises weatherproofing for exterior applications.
6. Does My Installation Environment Require Special Materials?
Environmental conditions determine hardware material requirements more than aesthetic preferences, yet many buyers select based on appearance while ignoring performance needs. Bathroom installations fail at twice the rate of other locations due to moisture damage on standard finishes.
High-humidity environments require corrosion-resistant materials that cost 25-50% more than standard options. Stainless steel provides ultimate durability in bathrooms and coastal areas where salt spray destroys standard finishes within months. Hot-dipped galvanizing offers good corrosion resistance at a lower cost but limits finish options to natural gray.
Outdoor installations demand weatherproof construction throughout the entire system. This includes not only tracks and hangers but also mounting hardware, door seals, and protective flashing.
Professional exterior systems incorporate aluminum track covers and rain guards that prevent water accumulation, leading to rust and operational failures.
Temperature extremes create dimensional changes that bind doors in precisely-fitted tracks. Metal components expand and contract with temperature changes, while wood doors can change up to 1/4 inch in width with humidity variations. Hardware systems must accommodate these movements through proper clearances and flexible mounting systems.
UV exposure degrades finishes and causes wood bleaching without proper protective coatings. Doors facing south or west receive intense UV exposure that fades stains and breaks down protective finishes within 2-3 years. UV-resistant topcoats add $50-100 to finishing costs but prevent expensive refinishing cycles.
7. What Safety Features Are Non-Negotiable?
Safety failures create liability nightmares and injury risks that far exceed the cost of proper hardware, yet many budget systems omit critical safety features to reduce manufacturing costs. Professional installers consider certain safety features absolutely mandatory regardless of budget constraints.
Anti-jump blocks prevent doors from lifting off tracks during operation or building settlement. These small components, costing $10-20, prevent 100+ pound doors from falling without warning. Quality manufacturers include anti-jump blocks standard, while budget options often omit them as "optional accessories."
Floor guides control door swing and prevent wall damage during operation. Without bottom guidance, doors sway unpredictably, striking walls and stressing top-mount hardware beyond design limits. The minor inconvenience of floor guide installation pales compared to the damage from uncontrolled door movement.
Soft-close mechanisms reduce stress on mounting systems while preventing jarring crashes that damage walls and wake sleeping children. Professional installers report that soft-close mechanisms reduce hardware stress by 40%, effectively doubling system lifespan.
Building codes impose additional safety requirements for commercial installations. Manual sliding doors face restrictions in spaces with more than 10 occupants, often requiring fire ratings and ADA compliance features that add $200-500 to hardware costs but prevent costly code violations.
8. How Complex Is the Installation Process?
Installation complexity determines whether your barn door project costs $200 or $2,000, yet most buyers underestimate the skills and tools required for professional results.
Simple installations take 2-4 hours while complex projects require 1-2 days plus potential contractor assistance for electrical or structural modifications.
Basic installations require finding wall studs, mounting header boards, and aligning tracks precisely. Success depends on having a quality 48-inch level—shorter levels guarantee misalignment that causes doors to drift. Professional-grade stud finders prevent the catastrophic mistake of mounting into drywall alone.
Complex installations involve electrical relocations, HVAC modifications, or structural reinforcement that require contractor assistance. Moving a single light switch costs $100-300, while relocating HVAC vents can exceed $500. Projects can transform from $200 DIY endeavors into $1,400 professional installations when discovering electrical or HVAC conflicts.
Tool requirements extend beyond basic drill bits. Professional installations require laser levels for accurate alignment, specialty bits for masonry drilling, and torque-limiting drivers to prevent over-tightening that strips mounting hardware. Without proper tools, DIY installations often require professional correction, costing $400-1,500.
Flooring type significantly impacts installation complexity. Carpet requires mounting doors higher to prevent friction, often necessitating wall-mounted guides instead of floor guides. Tile installations complicate floor guide mounting, as drilling through tile risks cracking expensive materials.
9. What's Included vs. What Must I Buy Separately?
"Complete" hardware kits include everything needed for installation, leading to project delays and budget overruns when missing components force additional shopping trips. Understanding what's typically included versus what you'll need to source separately prevents frustrating surprises during installation.
Most kits include: track sections, hangers/rollers, mounting hardware for the track, basic floor guide, and installation instructions. Quality hardware kits add anti-jump blocks, soft-close mechanisms, and comprehensive mounting hardware, including lag bolts and spacers.
You'll typically need to buy separately: header board lumber ($20-50), door handles ($25-200), wood screws for header installation ($10-15), appropriate drill bits ($15-30), and potentially wall anchors if your situation differs from kit assumptions.
Professional-grade tools often justify their cost through improved results and time savings. A quality laser level ($100-200) ensures perfect track alignment that prevents doors from drifting. Professional stud finders ($50-100) locate framing reliably while basic models often fail on textured walls or with unusual framing.
Door preparation costs catch buyers expecting plug-and-play installation. Custom sizing adds $200-800 when standard doors don't provide adequate coverage. Handle installation requires precision routing tools that most homeowners lack. Professional door finishing costs $80-300 but prevents moisture damage that destroys unfinished doors within two years.
10. Are There Building Code or HOA Restrictions?
Legal restrictions eliminate certain hardware options before aesthetic or budget considerations, yet most buyers discover these limitations only after purchasing incompatible equipment. Building codes and homeowner association rules create binding requirements that override personal preferences.
Commercial building codes restrict manual sliding barn doors to spaces with 10 or fewer occupants, immediately disqualifying them from most business applications without special fire ratings. Fire codes prove particularly complex, with commercial installations often requiring 20-90 minute fire-rated systems that cost significantly more than standard hardware.
ADA compliance introduces additional requirements for commercial installations. Doors must provide 32 inches of clear opening width, operate with less than 5 pounds of force, and feature hardware mounted between 34-48 inches above floor level. These requirements can add $100-300 to hardware costs but prevent costly discrimination lawsuits.
Residential building codes vary significantly by jurisdiction. California enforces strict egress requirements that may prohibit barn doors in certain applications, while coastal areas mandate corrosion-resistant materials. Some jurisdictions require permits for any barn door installation, while others exempt structures under 200 square feet.
HOA restrictions often prove more limiting than building codes, restricting exterior door styles, colors, and hardware finishes to maintain neighborhood aesthetics. Violation fines can exceed the cost of compliant hardware, making research essential before purchasing.
11. What Quality Indicators Should I Look For?
Quality indicators separate 30-year hardware from 3-year failures, yet marketing materials emphasize appearance over engineering specifications. Professional installers rely on measurable specifications rather than marketing claims when selecting hardware for demanding applications.
Steel gauge thickness provides the most reliable quality indicator. Premium tracks use 3/16-inch thick steel (roughly 3.5 times thicker than car body panels), while budget options use thinner steel that bends under load. Track thickness directly correlates with weight capacity and long-term durability.
Bearing construction determines operational smoothness and longevity. Premium systems employ sealed steel roller bearings designed for lifetime operation without maintenance. These bearings, tested for over 225,000 feet of travel, operate silently even after years of use. Budget hardware relies on simple plastic wheels that develop flat spots and require replacement within 2-3 years.
Finish quality proves equally critical for long-term performance. True powder-coating creates a baked-on protective layer 2-3 times thicker than spray paint, resisting chipping and corrosion for decades. Hot-dipped galvanizing provides superior corrosion resistance for outdoor applications. Spray-painted finishes, common on budget hardware, chip within months to expose rust-prone steel beneath.
Manufacturing standards provide objective quality metrics. Hardware meeting ANSI/BHMA A156.14 Grade 2 specifications undergoes standardized testing for weight capacity, cycle life, and finish durability. Manufacturers publishing test results demonstrate confidence in their products through transparency.
12. How Do I Calculate Total Project Cost?
Hidden expenses routinely double or triple budget projections, transforming $200 hardware kits into $1,000 installations when buyers focus only on hardware costs while ignoring related expenses. Professional cost estimates include all components needed for complete installation rather than just the primary hardware.
Hardware costs range from $100 to $1,500, depending on quality and features. Budget systems ($100-300) work for lightweight interior doors but require replacement every 3-5 years. Mid-range options ($300-600) provide reliable service for most residential applications. Premium systems ($600-1,500) justify their cost through decades of trouble-free operation.
Installation materials add $50-200 to most projects: header board lumber ($20-50), mounting hardware ($15-40), door preparation supplies ($15-75), and miscellaneous fasteners and tools ($20-50). These costs seem minor individually, but they accumulate quickly.
Professional installation ranges from $200 to $800, depending on complexity and local rates. Simple installations average $200-400, while complex projects involving structural modifications or electrical work can exceed $1,000.
Structural modifications represent the largest cost variable. Basic header board installation adds $100-200 in materials and labor. Wall reinforcement for heavy doors costs $300-600. Electrical relocations average $200-500 per circuit. HVAC modifications can exceed $1,000 when ductwork requires rerouting.
13. What Red Flags Indicate Poor Quality Hardware?
Warning signs reveal hardware destined to fail before purchase, yet marketing materials disguise quality shortcuts that become apparent only after installation. Experienced installers identify specific indicators that separate problematic systems from reliable options.
Aluminum construction belongs at the bottom of the quality hierarchy despite marketing claims of "lightweight strength." Aluminum's lower strength-to-weight ratio leads to bending under loads that steel handles easily. Professional installers avoid aluminum hardware for any application over 150 pounds.
Missing safety features indicate corners were cut throughout the manufacturing process. Anti-jump blocks and proper floor guides are essential safety components that quality manufacturers include as standard. Budget options often omit these features to reduce costs.
Vague weight specifications suggest inadequate engineering investment. Reputable manufacturers clearly state weight capacities, testing procedures, and safety margins. Companies avoiding these specifications likely haven't invested in proper testing, leaving buyers to discover limitations through catastrophic failure.
Poor installation instructions reveal manufacturing quality before purchase. Professional-grade hardware includes detailed instructions with technical drawings, required tool lists, and troubleshooting guides. Budget hardware often provides single-page diagrams with unclear translations that guarantee installation problems.
14. What Warranty and Support Should I Expect?
Warranty terms reveal manufacturer confidence in product longevity, while support quality determines project success when problems arise. Premium manufacturers back their hardware with comprehensive warranties and readily available technical support.
Warranty duration correlates directly with expected product life. Quality hardware features 2-10 year warranties covering defects in materials and workmanship. Budget options typically offer 1-year warranties that barely exceed the failure period for substandard components. Lifetime warranties, while rare, indicate exceptional manufacturer confidence.
Warranty coverage varies significantly between manufacturers. Comprehensive warranties cover finish defects, bearing failure, and structural problems. Limited warranties exclude wear items like rollers and focus only on catastrophic failures. Understanding coverage prevents disappointment when normal wear items need replacement.
Technical support proves invaluable during installation and troubleshooting. Companies offering telephone support demonstrate commitment to customer success beyond the initial sale. Professional-grade manufacturers maintain technical departments staffed with installation experts who can solve complex problems.
Replacement parts availability determines long-term serviceability. Established manufacturers maintain parts inventory for discontinued models, allowing repairs rather than complete replacement. New companies or private-label products often lack parts support, forcing replacement of entire systems when individual components fail.
15. Who Should I Consider for Professional Installation?
Professional installation justifies its cost through guaranteed results and accountability, yet installer selection requires careful evaluation beyond basic pricing comparisons. The difference between skilled professionals and general handymen becomes apparent in complex installations where experience prevents costly mistakes.
Specialized barn door installers offer expertise with hardware systems and common problems, but may charge premium rates. These professionals understand weight calculations, structural requirements, and troubleshooting techniques that prevent callbacks and warranty issues.
General contractors provide broader construction skills for complex projects involving electrical work, structural modifications, or finish carpentry. While costing more than specialists, contractors can handle permit applications and coordinate multiple trades for comprehensive renovations.
Handyman services offer economical installation for straightforward projects but may lack expertise for complex situations. Success depends on individual experience and skill level rather than systematic training. References and licensing verification become critical for handyman selection.
Installation costs vary by region and complexity but typically range from $200 to $800. Simple installations in standard construction average $200-400. Complex projects requiring structural work or electrical modifications can exceed $1,000. Professional correction of DIY mistakes often costs more than the initial professional installation.
16. Should I Buy All Components from One Manufacturer?
Component compatibility affects both performance and warranty coverage, yet mix-and-match purchasing can reduce costs if done correctly. Understanding which components must match and which can be substituted prevents compatibility problems while allowing cost optimization.
Track and hangers must come from the same manufacturer to ensure proper fit and load distribution. Hanger spacing, roller diameter, and mounting hole patterns vary between manufacturers, making substitution impossible without modification.
Floor guides and stops offer substitution opportunities since these components use standardized dimensions. Generic floor guides costing $10-20 often perform identically to manufacturer-specific options costing $40-60. Universal soft-close mechanisms provide another upgrade opportunity regardless of track brand.
Mounting hardware can often be improved beyond kit specifications. Professional-grade lag bolts, washers, and spacers cost $20-40 more than standard kit components but provide superior holding power and corrosion resistance. Stainless steel fasteners justify their premium in high-moisture environments.
Door handles and accessories offer complete freedom for customization since mounting requirements are standardized. Premium handles costing $100-300 can transform the appearance and operation of budget hardware systems. Custom powder-coating services can match any color scheme for $50-150.
Warranty implications must be considered when mixing components. Some manufacturers void warranties when non-original parts are used, while others honor warranties regardless of modification. Understanding warranty terms prevents coverage disputes when problems arise.
Purchase Right, Install Once
The difference between barn doors that operate flawlessly for decades and those that fail catastrophically within months lies in systematically evaluating these 15 critical factors before purchasing.
Every disaster—doors crashing to floors, walls crumbling under inadequate mounting,
Professional-grade purchasing prevents expensive failures.
Investing an extra $200-400 in quality hardware prevents the $1,000-2,500 costs associated with system failures, wall repairs, and professional corrections.
Skip the guesswork that leads to disasters. The Barn Door Hardware Store stocks only hardware that passes the 15-question test—weight calculators, installation guides, and expert matching tools included.
Shop the best barn door hardware today →
Purchase smart. Install once. Enjoy forever.