
Barn Door With Header Board Guide: Expert Tips for 2026
Ready to give your home a fresh, modern look? The barn door with header board trend is taking 2026 by storm, offering the perfect blend of style and practicality for any space.
In this guide, you’ll get expert advice on how to choose, install, and get the most from your barn door with header board, whether you’re a seasoned DIYer or just getting started.
Curious about what makes header boards essential, how to plan your project, or how to avoid common mistakes? You’ll find all the answers here, along with inspiring design ideas and troubleshooting tips to help you create a standout feature in your home.
Understanding Barn Doors with Header Boards: Key Concepts for 2026
Stepping into the world of the barn door with header board opens up a blend of modern style and practicality for your home. If you want a sliding door that’s both sturdy and stunning, understanding these core concepts is the first step. Let’s break down the essentials you need to know before you dive in.
What Is a Header Board and Why Is It Essential?
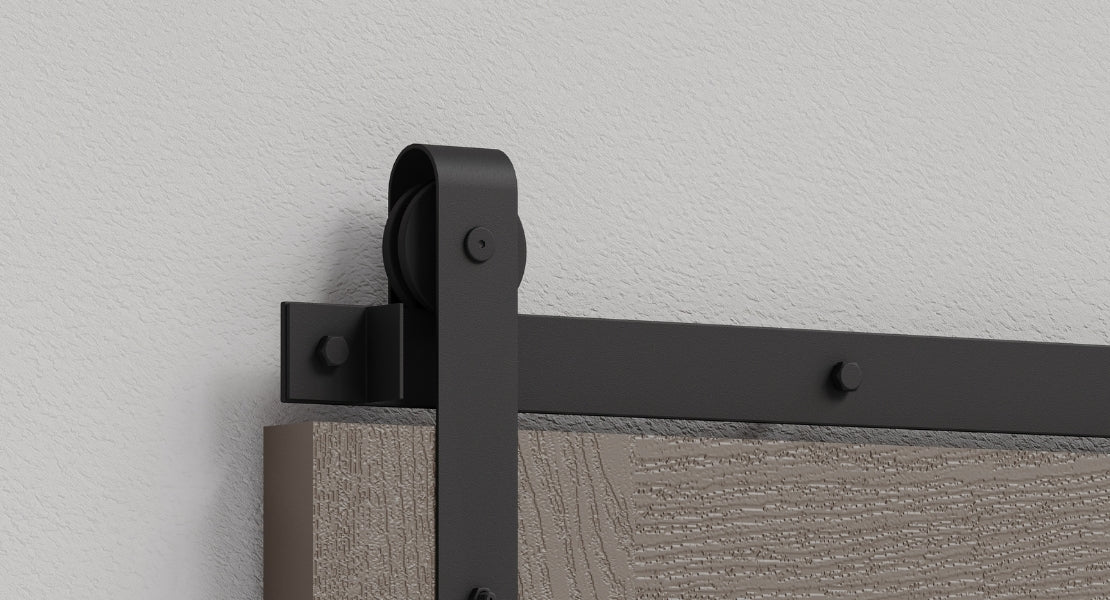
A header board is the unsung hero in any barn door with header board installation. It’s a horizontal beam, usually made of wood or steel-reinforced material, that mounts above your doorway to support the barn door track. The main job of the header board is to evenly distribute the door’s weight, preventing wall damage and ensuring long-term durability. It’s especially critical if your wall is drywall, plaster, or masonry, as these materials alone might not hold heavy doors securely.
Here’s a quick comparison:
| Installation Type | Stability | Wall Damage Risk | Longevity |
|---|---|---|---|
| With Header Board | High | Minimal | Excellent |
| Without Header Board | Low | High | Poor |
In 2026, most header boards are engineered wood or steel-reinforced for extra strength. Want to see how it works in practice? Check out this Barn Door Installation Guide for visual step-by-step instructions that highlight just how vital a header board can be.
The Evolution of Barn Door Trends in Home Design
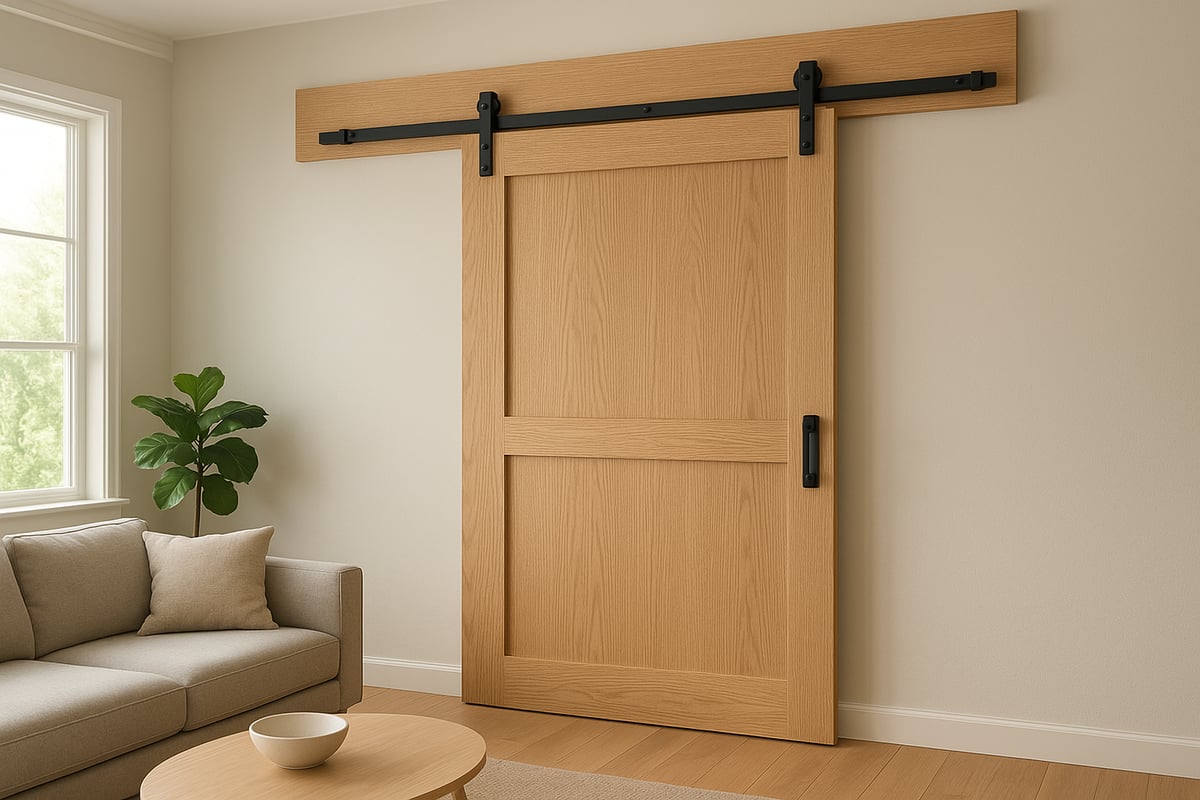
The barn door with header board has become a design staple, not just for rustic spaces but for modern homes, too. Over the past few years, homeowners have embraced barn doors in open-concept living areas, using them as stylish room dividers or statement pieces. In 2026, you’ll notice trends leaning toward minimalist and industrial finishes, with eco-friendly materials taking center stage.
What’s really driving this surge? People want privacy and noise reduction without sacrificing style. Data shows a 35% increase in barn door installations since 2020, a testament to their popularity. Whether you’re after a sleek matte black look or a reclaimed wood vibe, the barn door with header board fits right in—no matter the decor.
Key Advantages of Using a Header Board
Why should you always pair your barn door with header board? The answer lies in stability and flexibility. Heavy or oversized barn doors need extra support, and a header board delivers that by spreading the load across multiple studs. This means you aren’t limited by where your wall studs are located, making installation easier and more adaptable.
Future upgrades are also simpler, since you can switch out hardware or doors without tearing up your wall. Safety is another huge plus—the header board increases the door’s load-bearing capacity, reducing the risk of accidents. One homeowner shared how their barn door with header board made it possible to hang a custom, extra-wide door safely, transforming their entryway with peace of mind.
Common Misconceptions and Mistakes
Some folks think a barn door with header board is only needed for weak walls, but that’s a myth. Even solid walls can benefit, especially when you’re hanging a heavy or commercial-grade door. Another common mistake is ignoring how the header board looks alongside your door and trim, which can lead to a clunky or mismatched finish.
Want a quick visual? Picture two installs: one with a perfectly flush, painted header board that blends with the trim, and one where the board is off-center or unfinished. The difference is night and day. Take the time to plan your barn door with header board installation—you’ll thank yourself later with a door that’s both sturdy and stylish.
Planning Your Barn Door with Header Board Installation
Thinking about a barn door with header board for your next project? Smart planning is the secret to a smooth installation and a result you’ll love for years. Let’s break down each step so you’ll know exactly what to expect and how to make every decision count.
Assessing Your Space and Structural Needs
Before you even pick up a drill, start by evaluating your space for a barn door with header board. Measure the width and height of your doorway, plus the wall area where the door will slide. Pay close attention to the locations of wall studs, as they provide the main support.
- Use a stud finder to mark stud positions.
- Check for ceiling height and make sure there's enough clearance above the door.
- Look for nearby light switches, outlets, and trim that might interfere.
A practical checklist helps keep things on track:
| Assessment Point | Checked (Y/N) |
|---|---|
| Doorway width & height | |
| Stud locations marked | |
| Ceiling clearance | |
| Nearby obstructions |
Taking time with this step ensures your barn door with header board will both fit and function perfectly.
Selecting the Right Barn Door and Header Board Materials
Next up is choosing materials that match your style and the demands of your barn door with header board installation. Each option brings its own set of benefits. Wood is classic and warm, MDF offers budget-friendliness, steel is robust, and composites are eco-friendly and stable.
- Match the header board finish to your door, whether you want it stained, painted, or left raw.
- Pick hardware designed for compatibility with header boards.
- For 2026, many homeowners are seeking sustainable materials and low-VOC finishes.
Here’s a quick comparison table:
| Material | Pros | Cons |
|---|---|---|
| Wood | Natural look, strong | Can warp if untreated |
| MDF | Smooth, affordable | Less durable |
| Steel | Ultra-strong | Industrial look |
| Composite | Eco-friendly, stable | Limited finishes |
Choosing the right materials means your barn door with header board will look great and last.
Calculating Load and Weight Distribution
Proper support is essential for a safe and smooth barn door with header board. Start by checking your barn door’s weight, then consult manufacturer guidelines for header board sizing.
- Use the correct fasteners and anchors for your wall type.
- Make sure the header board can handle the door’s load, especially for oversized or solid wood designs.
- Refer to a load table or calculator for guidance.
Example:
| Door Weight (lbs) | Recommended Header Board Size |
|---|---|
| Up to 100 | 1x6 solid wood |
| 100–200 | 2x6 or engineered wood |
| 200+ | Steel-reinforced |
By following these steps, you’ll prevent sagging and ensure your barn door with header board remains safe and sturdy.
Budgeting and Timeline Considerations
Budget is a key factor when planning your barn door with header board. Costs can vary based on materials, size, and whether you hire a pro or tackle it DIY.
- Standard barn doors range from $200–$800; header boards add $50–$200.
- Hardware kits usually run $100–$300.
- Professional installation can double your total cost, but DIY saves money.
Sample budget for a 36” sliding barn door:
| Item | Cost Range |
|---|---|
| Door | $300–$600 |
| Header Board | $75–$150 |
| Hardware Kit | $150–$250 |
| Labor (Pro) | $200–$400 |
Most projects take 1–2 weekends from start to finish. Careful budgeting means your barn door with header board project stays on track.
The Barn Door Hardware Store: Your Trusted Source for Quality Hardware
When it’s time to buy, working with a specialist is a game changer for your barn door with header board project. The Barn Door Hardware Store has been the go-to source since 2016, offering a huge range of barn door hardware, custom kits, and accessories.
You’ll find benefits like custom sizing, hands-on expert support, free shipping, and a lifetime warranty. Their customer satisfaction is sky-high (4.9/5 rating), and real users rave about the quality and service. For the best selection and advice, check out their Barn door hardware kits selection to ensure your barn door with header board is both stylish and built to last.
Step-by-Step Guide: Installing a Barn Door with a Header Board
Ready to tackle your barn door with header board installation? This guide walks you through each step, so you can feel confident transforming your space. Whether you’re a seasoned DIYer or a first-timer, you’ll find practical tips and checklists to make the process smooth from start to finish.
Tools and Materials Checklist
Before you begin installing a barn door with header board, make sure you have all the right tools and materials on hand. Preparation saves time and reduces stress during the project.
Essential Tools:
- Drill (corded or cordless)
- Level (at least 4 feet long)
- Measuring tape (25 feet recommended)
- Stud finder
- Pencil or chalk for marking
- Socket set or wrench
- Screwdriver set
Materials:
- Header board (pre-cut to doorway width)
- Barn door track kit
- Fasteners and anchors (rated for your wall type)
- Barn door with header board compatible hardware
- Handles, pulls, and floor guides
Safety Gear:
- Work gloves
- Eye protection
- Dust mask (if drilling into masonry or plaster)
Printable Pre-Installation Checklist:
- Measure doorway width and height
- Confirm wall stud locations
- Gather all tools and safety gear
- Unpack barn door with header board kit and inspect parts
- Review installation instructions
Having this checklist handy keeps your barn door with header board install on track from the very start.
Preparing the Wall and Marking Measurements
Getting accurate measurements is crucial for a successful barn door with header board installation. Start by locating and marking wall studs above your door opening. Use a stud finder for precision, and double-check each mark by gently tapping a small nail to confirm solid wood.
Next, measure the width of your door opening and add at least 2 inches on each side for proper door overlap. Mark the desired height for the header board, ensuring enough clearance above the door to fit the track and rollers.
Draw level and plumb lines where the header board will be mounted. Use a long level for best results. Mark where each fastener will go, aligning with stud locations or masonry anchors.
A clear diagram of measurement points can help visualize where everything needs to be installed. Taking time with these markings makes the rest of the barn door with header board process much easier.
Installing the Header Board Securely
Now it’s time to install the header board. Position it so it fully spans the door opening and reaches at least two wall studs on each side. Hold the board in place and check for level, making small adjustments as needed.
For drywall or plaster, use long lag screws driven directly into studs. For masonry, use heavy-duty anchors. Pre-drill holes to prevent wood splitting. Tighten fasteners firmly but avoid over-tightening, which can damage the board or wall.
A flush installation gives a seamless look and maximizes support. Double-check for level and structural integrity before moving on. For guidance on choosing the right board size and fastener type, the Barn Door Header Board Calculator is a handy tool.
Common mistakes to avoid include misalignment, skipping studs, or using undersized fasteners. Following these steps ensures your barn door with header board will be safe and sturdy for years to come.
Mounting the Barn Door Track to the Header Board
With the header board installed, align the barn door track so it sits evenly above the door opening. Mark each mounting hole location on the header board. Use the hardware included with your track kit, as these are designed for the weight and style of your barn door with header board.
Secure the track to the header board using lag bolts or screws, tightening each one evenly. Double-check all measurements to ensure the track is perfectly straight. This step is especially important if you’re installing a double or bypass system, where precise alignment affects door movement.
Refer to the track manufacturer’s instructions for spacing and hardware compatibility. For visual learners, step-by-step images or diagrams can clarify the sequence of installation.
Ensuring the track is level and secure guarantees smooth operation of your barn door with header board setup.
Hanging the Barn Door and Adjusting Hardware
Attach the hangers and rollers to the top of the barn door with header board system. Most kits require pre-drilling holes and tightening bolts through the door. Carefully lift the door onto the track, making sure the rollers sit evenly.
Test the door by sliding it back and forth. Adjust the stops at each end of the track to prevent the door from rolling off. Install anti-jump devices and floor guides for added safety.
If the door doesn’t glide smoothly or sits unevenly, check for misalignment or loose hardware. Most common alignment issues can be fixed by loosening the hangers slightly and re-leveling the door.
Taking your time with these adjustments ensures your barn door with header board looks and functions perfectly.
Finishing Touches and Safety Checks
With installation nearly complete, add finishing touches to your barn door with header board. Install handles, pulls, and any decorative hardware. Attach floor guides to keep the door stable during use.
Inspect the entire setup for smooth operation and safety. Check all fasteners, adjust stops, and make sure nothing wobbles or rattles. Clean up dust and debris, and do a final walkthrough to catch any small issues.
A post-installation checklist helps you confirm that every part of your barn door with header board is secure and ready for daily use. Enjoy your upgraded space and the satisfaction of a job well done!
Design Inspiration: Styles, Finishes & Customization Ideas
Looking for ways to make your barn door with header board stand out in 2026? The right combination of style, finish, and customization can turn a simple doorway into a bold design feature. Let’s explore the latest trends and see how you can create a look that’s both functional and uniquely yours.
Trending Barn Door Styles for 2026
This year, the barn door with header board is all about blending classic charm with modern flair. You’ll spot minimalist designs with clean lines, reclaimed wood finishes that add texture, and industrial touches like exposed metal. Farmhouse styles are still popular, but now come in fresh colors and slimmer profiles.
Matte black hardware is a favorite for adding contrast, while bold paint colors make a statement in open spaces. For eco-conscious homeowners, sustainable materials are in demand. Want to see what’s trending? Check out the Versatile natural pine wood barn door for a look that’s both stylish and compatible with a header board installation.
Customizing Your Header Board for Visual Impact
Your barn door with header board doesn’t have to be basic. Customizing the header board itself can make your entryway pop. Try adding decorative trim or molding for a touch of elegance. Painting or staining the header board to match or contrast with your door can help tie the whole look together.
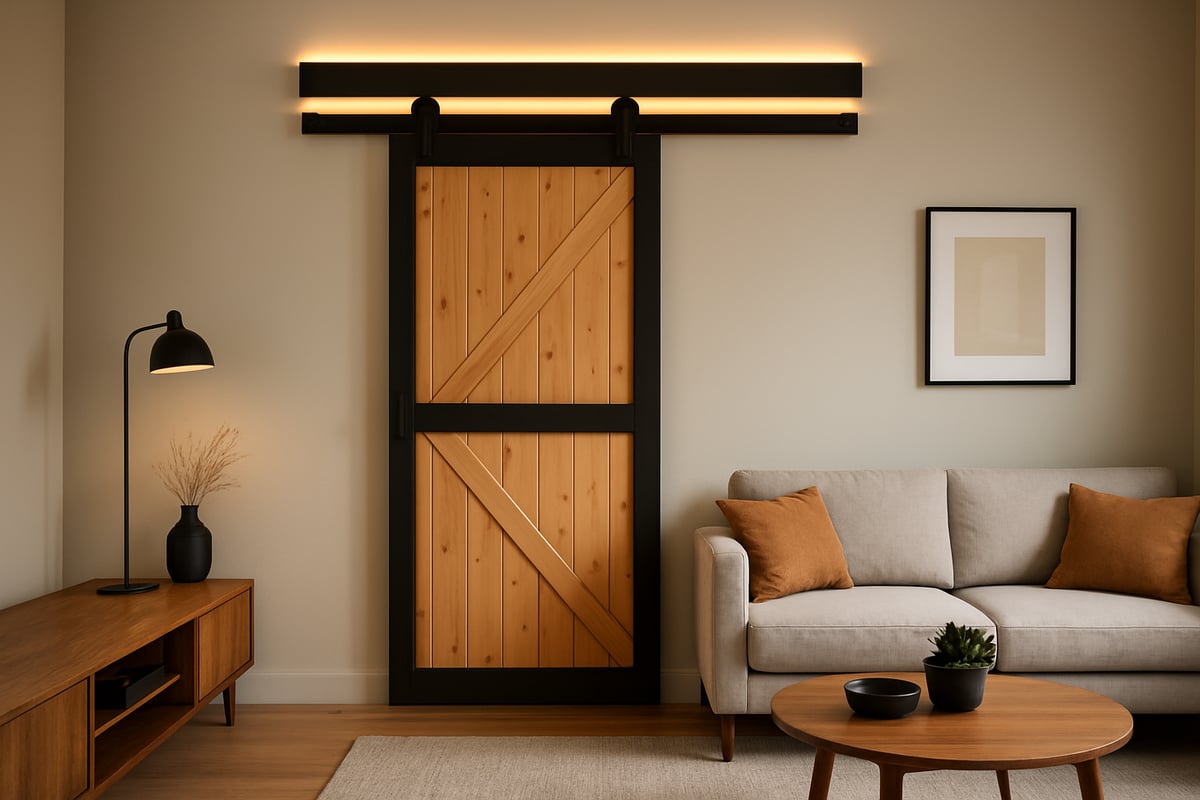
Some homeowners are even integrating LED lighting into their header boards for a subtle glow. If you enjoy a DIY challenge, experiment with reclaimed wood or unique finishes to create a one-of-a-kind piece. Before and after photos reveal just how much a custom header board can elevate your space.
Hardware and Accessory Pairings
Pairing the right hardware with your barn door with header board is all about balance and function. Sleek handles, contemporary pulls, and matching tracks can create a cohesive look. If you crave quiet and convenience, consider a soft-close mechanism for barn doors to ensure smooth operation.
Interior designers love mixing soft-close systems with bold hardware for a modern touch. Here are some popular pairings:
- Matte black tracks with brushed nickel handles
- Soft-close rollers for heavy doors
- Contrasting metal accents for visual interest
No matter your style, the right accessories can make your barn door both beautiful and practical.
Space-Saving and Accessibility Solutions
A barn door with header board is a smart solution for tight spaces or areas where a traditional swing door won’t fit. Bypass and bifold systems are especially handy in apartments or small offices. These designs allow multiple doors to slide past each other, maximizing your usable space.
For accessibility, ADA-compliant hardware and easy-grip handles are available. Many homeowners use barn doors to create flexible partitions between rooms. A recent case study showed how a compact barn door setup transformed a tiny studio, making it feel more open and functional.
Real-World Inspiration: Customer Showcase
Nothing beats real-life examples when planning your barn door with header board project. Homeowners are getting creative, using these doors in kitchens, bedrooms, offices, and even commercial spaces. One standout installation featured a reclaimed wood door with custom lighting in a downtown loft, drawing rave reviews from visitors.
From cozy farmhouse kitchens to modern office suites, the versatility of this door style shines through. If you’re looking for fresh ideas, browse online galleries or reach out to local installers for inspiration. Your next project could be the talk of your neighborhood.
Troubleshooting & Maintenance for Longevity
Keeping your barn door with header board in top shape means addressing issues quickly and performing regular checkups. Whether you’re a DIY enthusiast or just want a hassle-free setup, knowing what to look for and how to fix it can save you time and money.
Common Installation Issues and Fixes
Even with careful planning, a barn door with header board can run into a few common problems. The most frequent include track misalignment, uneven sliding, or a header board that feels loose.
- Track misalignment: Use a level to ensure the track is perfectly straight. Adjust mounting screws if needed.
- Loose header board: Double-check all fasteners and use wall anchors for added grip.
- Door scraping or sticking: Sand down any rough edges or check for debris in the track.
A quick fix for a barn door with header board often involves tightening hardware or realigning the track. Addressing these early prevents wear and tear over time.
Preventative Maintenance Tips
To extend the life of your barn door with header board, commit to a simple maintenance routine. Regular inspection can catch small issues before they become bigger headaches.
- Inspect all hardware and fasteners every few months.
- Clean tracks and rollers with a damp cloth to remove dust.
- Lubricate moving parts using a silicone-based spray.
Protect the finish of your barn door with header board from moisture by wiping away spills quickly. A little attention goes a long way in keeping everything running smoothly.
Upgrading and Modifying Existing Installations
If you want to update your barn door with header board, there are plenty of options. Retrofitting a new header board is possible for older setups, and swapping out hardware can refresh your style.
For step-by-step help, check out the Barn Door Hardware Installation Guide for tips on safe upgrades and modifications. Whether you’re installing double bypass barn door hardware or simply updating handles, following guidelines ensures your barn door with header board remains sturdy and stylish.
Expert Advice for Long-Term Performance
Sometimes, it pays to call in a pro for your barn door with header board. Watch for signs like sagging doors, persistent misalignment, or excessive wear that might signal structural issues.
When in doubt, professional services can handle repairs or adjustments efficiently. Keep a list of trusted resources handy for ongoing support and parts. Investing in quality hardware and regular upkeep means your barn door with header board will serve you well for years to come.
So, now that you’ve got the inside scoop on barn doors with header boards and all the tips you need for a smooth installation, you might be wondering—where do you actually find hardware that’s both reliable and stylish? That’s where I always point folks to The Barn Door Hardware Store Our family owned team has been at this since 2016, offering everything from custom sizing to free shipping and a lifetime warranty. If you want your project to look great and last for years, you’ll appreciate having real experts in your corner. Why not check us out and see what fits your space?