
Door Track Sliding Guide: Expert Tips for Smooth Operation 2026
Tired of dealing with a stubborn, squeaky door that just won’t glide the way it should? You’re not alone—door track sliding problems are one of the most common household frustrations.
This guide is packed with expert tips and the latest advice for smooth door track sliding in 2026. You’ll discover the different types of tracks, how to install them, keep them running smoothly, fix issues, and even upgrade your setup.
Imagine hassle-free doors that work perfectly every time. Ready to say goodbye to sticky tracks? Dive in and unlock the secrets to effortless sliding doors.
Understanding Sliding Door Track Systems
Struggling with a stubborn door track sliding setup? You are not alone. Let us break down the essentials of sliding door track systems, so you can finally enjoy smooth, hassle-free door movement in your home or business.

Types of Sliding Door Tracks
When it comes to door track sliding systems, you have several options. The three most common types are:
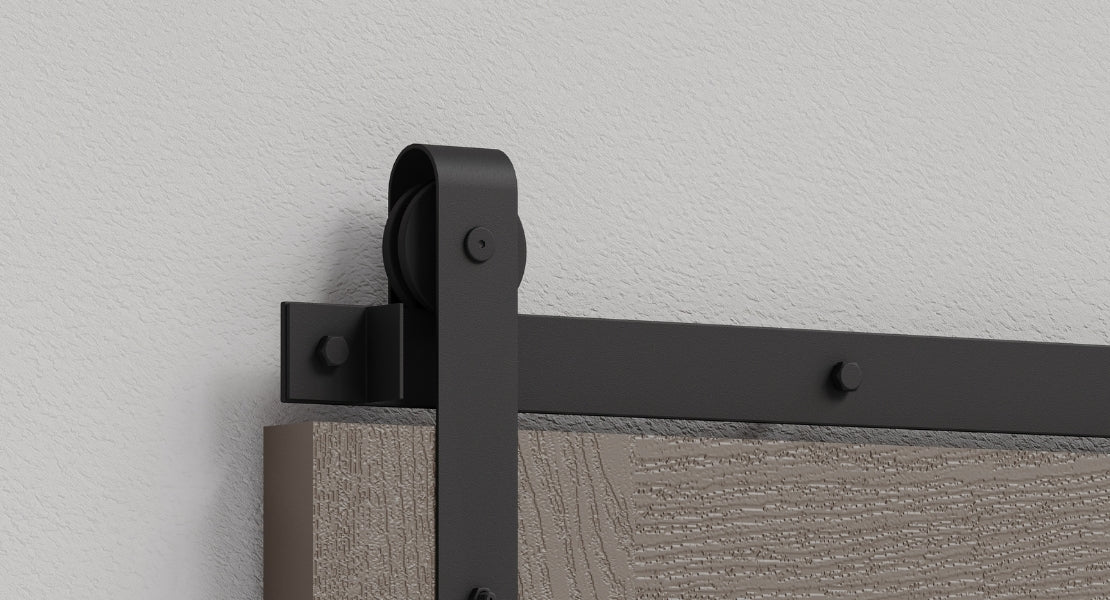
- Top-hung tracks: The door hangs from rollers attached to a sturdy track mounted above the opening. These systems are great for keeping floors clear and are popular for barn doors and modern interiors.
- Bottom-rolling tracks: Here, the door's weight is supported by rollers that glide along a floor-mounted track. This setup is ideal for especially heavy doors or where overhead support is limited.
- Bypass tracks: With this system, two or more doors slide past each other on parallel tracks. Closets and room dividers often use this design for maximum space efficiency.
Material matters, too. You will typically find tracks made from:
| Material | Pros | Cons |
|---|---|---|
| Steel | Strong, durable, supports heavy doors | Heavier, can corrode |
| Aluminum | Lightweight, rust-resistant | Less robust for big doors |
| Plastic | Budget-friendly, quiet operation | Wears out faster |
For example, in homes, you might choose a sleek aluminum top-hung track for a glass patio door, while a commercial space may need a heavy-duty steel system for security and longevity.
Design flexibility is a huge plus with door track sliding systems. You can install them anywhere: barn doors in rustic kitchens, glass doors in offices, or even multi-panel setups for expansive openings. A recent industry report found that sliding doors now make up 30% of all interior door installations in new builds, thanks in part to their space-saving benefits and modern style.
Trends like minimalist interiors and the surge in barn door popularity are driving more homeowners to explore new track options. Each system comes with its quirks: top-hung tracks may need strong wall support, bottom-rolling tracks require spotless floors, and bypass tracks can sometimes misalign if not installed perfectly.
If you are weighing the pros and cons of different systems or materials, you might find this Sliding Door Track Systems Comparison helpful for a side-by-side breakdown.
Key Components of a Sliding Track System
Let us get into the nuts and bolts of what makes a door track sliding system work smoothly. The main components are:
- Rollers: These are the wheels that let your door glide. Quality rollers reduce noise and wear, and you will find options for light, standard, or heavy-duty doors.
- Guides: Floor or wall-mounted guides keep the door steady, preventing swinging or wobbling. They are vital for both safety and longevity.
- Tracks: The backbone of the system, tracks hold everything together. Choose a track that matches your door's weight, width, and frequency of use.
- Stops: These prevent the door from rolling off the ends of the track, keeping both people and walls safe.
Single, double, and multi-panel systems are available. Single-panel is the classic barn door look, while double and multi-panel setups are ideal for closets or wide entries. Compatibility is key: always match your hardware to the door's weight and material. For a massive barn door, you will want heavy-duty rollers and a steel track, but a lightweight closet can get by with standard aluminum parts.
Here is a practical example: If you are hanging an oversized barn door, investing in heavy-duty rollers and a reinforced track will save you headaches down the line. Using the right components ensures your door track sliding system stays quiet, safe, and easy to use for years.
Understanding these fundamentals will help you choose the best track system for your space and avoid common pitfalls, like using weak hardware for a heavy door or mismatching components. The right combination of track, rollers, guides, and stops is the secret to a flawless sliding door experience.
Preparing for Installation: Tools, Measurements, and Safety
Getting ready for a door track sliding project? Preparation is where smooth operation begins. If you want your sliding door to glide quietly and reliably, taking time to gather the right tools, measure carefully, and follow safety steps makes all the difference. Let’s break down everything you need for a hassle-free installation.

Essential Tools and Materials
Starting off, you’ll want to assemble all the must-have tools for your door track sliding installation. Here’s a quick checklist:
- Level or laser level for precise alignment
- Cordless drill and appropriate bits
- Tape measure for accurate sizing
- Anchors and screws (preferably those recommended by your hardware manufacturer)
- Screwdriver set
- Safety gear—think gloves and safety glasses
Quality matters. Opt for solid steel tracks and heavy-duty rollers for longevity, especially if your sliding door is large or gets frequent use. Always use manufacturer-recommended fasteners to avoid unexpected failures. If you’re unsure about any step or want visual guidance, check out this Step-by-Step Instruction Manual for detailed directions and pro tips.
A laser level can be a game changer, making sure your track is perfectly straight, even if your walls are a bit wavy. Remember, having the right tools on hand means fewer surprises down the line.
Accurate Measurements and Planning
Next up, let’s talk measurements. Accurate sizing is at the heart of all successful door track sliding projects. Measure the width and height of your door slab, then add clearance for smooth movement. Don’t forget to account for overlap and the space your door needs on the wall when open.
Use this formula for track length: twice the width of your door plus a small buffer. Mark stud locations with a pencil, and double-check for any electrical wires or pipes in the wall before drilling. If you’re installing a door in an older home, scan for hazards like lead paint.
Are you planning for accessibility? Make sure your measurements allow for ADA compliance, giving enough clearance for wheelchairs or walkers. Careful planning at this stage can save you from headaches (and extra holes in the wall) later.
Safety Precautions
Safety isn’t just a box to tick—it’s essential for every door track sliding installation. Always wear eye and hand protection when drilling or handling sharp hardware. If your sliding door is heavy, don’t risk an injury; ask a friend for help or use lifting tools.
Before you start drilling, check for older materials like lead paint or asbestos, especially in homes built before 1980. If you suspect hazardous materials, consult a professional before proceeding.
For secure mounting, always attach tracks to wall studs or blocking, not just drywall. This keeps your door track sliding system sturdy and prevents accidents. Take your time, double-check every step, and you’ll set the stage for a smooth, safe installation.
Step-by-Step Sliding Door Track Installation Guide
Tackling a door track sliding project can feel intimidating, but breaking it down into clear steps makes it totally manageable. Whether you’re refreshing a closet, upgrading barn doors, or installing a slick modern divider, following an organized process is key. Ready to roll up your sleeves and get started? Let’s walk through each essential stage for a smooth, hassle-free door track sliding experience.
Step 1: Preparing the Opening and Wall
First things first: let’s prep the workspace. Clear away furniture and any clutter near the installation area. If there’s an old door or hardware, remove it carefully. Take a minute to inspect the wall—patch up holes and smooth out uneven spots so your new door track sliding system sits perfectly flush.
Next, grab your tape measure and mark the ideal mounting height. Most people aim for a couple of inches above the door for a sleek look, but always check your hardware instructions. Use a pencil to mark stud locations along the wall. This is crucial for a sturdy, long-lasting install.
By taking time to prep now, you’re setting yourself up for a trouble-free door track sliding process later. Trust us, your future self will thank you.
Step 2: Installing the Track
It’s time to secure the heart of your door track sliding system: the track itself. Start by positioning the brackets or mounting hardware directly over your marked studs. If your wall isn’t perfectly even, adjustable mounts can help you achieve a level setup.
Double-check your alignment with a bubble or laser level—crooked tracks cause headaches down the road. Once you’re satisfied, use a drill to drive in the manufacturer-recommended fasteners. For double sliding doors, reviewing the Double Track Roller Specs and Clearances can help ensure you have the right clearances and hardware.
Before moving on, gently tug the track to confirm it’s rock-solid. A secure foundation is the secret to a smooth door track sliding experience.
Step 3: Attaching Rollers and Guides
Now for the pieces that keep things moving—literally. Attach the rollers to the top edge of your door, following the instructions for your specific model. If your door is heavy or oversized, opt for heavy-duty rollers for added reliability.
Next, install the floor guides. These little components are easy to overlook, but they keep your door tracking straight and prevent annoying wobbles or rubs. Make sure the guides are aligned with the track above for flawless door track sliding.
Once everything is in place, slide the door back and forth by hand to check for smooth movement. If you feel resistance, double-check that nothing’s obstructing the path and that the guides are properly set.
Step 4: Hanging the Door and Final Adjustments
Here comes the fun part—hanging your door! This step can be a two-person job, especially for heavy doors. Carefully lift the door and place the rollers onto the track, ensuring each one is secure.
Adjust the roller tension if needed. Some systems have built-in screws or dials for fine-tuning. Test the door’s glide from end to end. If it drags or sticks, minor tweaks to the roller height or guide positions usually do the trick.
Don’t forget safety stops and anti-jump devices. These features keep your door safely on track and prevent accidental derailments, making your door track sliding system both smooth and secure.
Step 5: Finishing Touches
The last step is all about the details. Add handles, pulls, or locks to match your style. If you want an ultra-quiet close, consider installing soft-close mechanisms or dampers.
Listen for any rattles or vibrations. A little felt pad or a quick adjustment can work wonders. Wipe down the track and surrounding area, then do a final inspection to make sure everything looks and works just right.
With these finishing touches, your door track sliding project is complete—and you can enjoy effortless operation every time you open or close your door.
Maintenance Tips for Long-Lasting, Smooth Operation
Keeping your door track sliding smoothly is not just about initial installation—ongoing care is what truly makes the difference. Ever noticed how a little grit or a wobbly roller can turn a whisper-quiet glide into a noisy struggle? A consistent maintenance routine can save you from costly repairs and daily annoyance.
Regular Cleaning and Lubrication
Dirt, dust, and even pet hair can quickly build up in your door track sliding system, causing friction and wear. To keep things running effortlessly, plan to clean the tracks every few weeks. For most track materials, a vacuum with a crevice tool is perfect for removing loose debris. Follow up with a damp microfiber cloth.
Here's a quick reference for safe cleaning agents:
| Track Material | Safe Cleaning Agent | Avoid |
|---|---|---|
| Steel | Mild soapy water | Abrasives, bleach |
| Aluminum | Vinegar and water mix | Strong acids |
| Plastic | Mild dish soap solution | Solvents, acetone |
After cleaning, apply a silicone-based lubricant directly to the rollers and inside the track. Do this every two to three months or whenever you notice resistance. Avoid over-lubrication, which can attract more dirt. Always check your door track sliding hardware’s manual for recommended products.
Inspecting for Wear and Damage
Routine inspection is your best defense against sudden failure. Every couple of months, look closely at your door track sliding system. Start with the rollers—are they chipped or flattened? Worn rollers can cause the door to stick or even jump the track.
- Inspect guides and stops for cracks or looseness.
- Check the track itself for dents, warping, or rust.
- Tighten any loose screws or mounting brackets.
- If you spot significant wear, swap out the damaged parts before they lead to bigger problems.
A quick check can prevent a minor issue from turning into a full-blown repair. Remember, a smooth door track sliding experience depends on all components working in harmony.
Preventing Common Problems
Ever had a door that squeaks, sticks, or derails at the worst possible moment? Most of these issues come down to minor misalignments or lack of upkeep. Regularly adjusting the track and roller height can solve a lot of headaches.
If your door drags on the floor, check that the track is level and the rollers are properly tensioned. For doors that squeak, make sure guides and rollers are lubricated and free from debris.
For a deeper dive into causes and solutions, check out this handy guide on Common Issues with Sliding Door Tracks. It breaks down frequent problems with practical fixes, helping you keep your door track sliding like new.
Seasonal and Environmental Considerations
Did you know changes in humidity or temperature can affect your door track sliding performance? Wood doors may expand or contract, while metal tracks can shift slightly in extreme temperatures. If you notice increased resistance during certain seasons, this could be why.
For exterior sliding doors, inspect weather seals and clean away mud or leaves after storms. Applying a protective wax to metal tracks helps guard against rust. Industry surveys show that 40% of sliding door failures result from skipped maintenance, so keeping a seasonal checklist pays off.
With a little attention and these simple steps, you can enjoy hassle-free door track sliding year-round, no matter the weather.

Troubleshooting Sliding Door Track Issues
Sliding doors are meant to glide smoothly, but what happens when your door track sliding system starts acting up? Frustration sets in, and suddenly, every squeak or jam feels like a major headache. Let’s break down how to troubleshoot these issues so you can get back to effortless operation.
Diagnosing Common Problems
First, let’s pinpoint what might be wrong with your door track sliding system. Is your door sticking, refusing to move, or making a racket every time you use it? Common problems include:
- Dirt or debris clogging the track.
- Worn or misaligned rollers.
- Bent or damaged tracks.
- Loose or missing guides.
- Gaps between the door and wall.
Sometimes, the issue is easy to spot, like a roller that has popped out. Other times, it might take a closer look. For heavy-duty or commercial doors, refer to the Heavy-Duty Single Track Specifications to ensure your hardware can support the door’s weight. Keeping these factors in mind helps you narrow down what’s causing your door track sliding headaches.
Step-by-Step Troubleshooting Process
Now that you’ve identified possible culprits, here’s a quick process for troubleshooting your door track sliding system:
- Visual Inspection: Look for dust, obstructions, or visible damage along the track and rollers.
- Listen Carefully: Open and close the door, listening for grinding, squeaking, or scraping.
- Test Alignment: Check if the door runs parallel to the wall and doesn’t wobble.
- Tighten and Adjust: Secure any loose screws and adjust roller height if needed.
- Quick Fix or Replace: Decide if a simple cleaning or adjustment will do, or if parts need replacement.
| Problem | Quick Fix | When to Replace |
|---|---|---|
| Sticking | Clean track, lube rollers | Severely worn rollers |
| Noisy operation | Adjust rollers, add lube | Damaged track |
| Door derails | Realign guides, check stops | Bent or cracked track |
By following these steps, you’ll often find the root of your door track sliding issues without calling in backup.
When to Call a Professional
Sometimes, DIY solutions aren’t enough. If your door track sliding setup has structural problems, severe misalignment, or if you’re dealing with heavy glass or commercial doors, it’s safer to get professional help.
Persistent problems, especially after you’ve gone through the troubleshooting checklist, can point to deeper issues. Commercial installations may also need to meet specific codes or standards, so professional input is a must in those cases.
If you ever feel unsure, prioritize safety. Experts can ensure your door track sliding hardware is installed and operating correctly, saving you time and potential damage in the long run.
Upgrading and Modernizing Your Sliding Door System
Ready to take your door track sliding setup into the future? Upgrading your sliding door system can transform your space, boost convenience, and add real value to your home or office. Whether you want a quieter glide, smart features, or just a stylish refresh, there are more options than ever to modernize your door track sliding experience.
Latest Innovations in Sliding Door Tracks
If you have ever wished your door track sliding system could close itself gently or operate with a swipe on your phone, you are not alone. The latest innovations include:
- Soft-close and self-closing mechanisms that prevent slamming and offer a smooth, controlled finish.
- Concealed and minimalist hardware for a clean, modern look that blends into any décor.
- Smart home compatibility with motorized tracks, sensors, and remote controls, making door track sliding systems more accessible and secure.
- Eco-friendly and sustainable materials like recycled aluminum and responsibly sourced wood, which appeal to environmentally conscious homeowners.
Industry trends show a growing demand for these features in both residential and commercial projects. For a deeper dive into where the market is heading, check out the Sliding and Folding Door Hardware Market Report.
Enhancing Aesthetics and Performance
Upgrading your door track sliding system is not just about how it works—it is also about how it looks and feels. Consider:
- Matching hardware finishes to your interior style, from matte black to brushed nickel.
- Adding designer handles, flush pulls, or custom accessories for a personal touch.
- Swapping out basic rollers for heavy-duty or quiet-glide options, especially for larger or more frequently used doors.
These upgrades can make your door track sliding system both a focal point and a functional asset. Small changes, like a new handle or a silent roller, often deliver big improvements in daily use.
Cost vs. Value: When to Upgrade
Wondering if it is worth investing in a new door track sliding setup? Here is a quick comparison to help you decide:
| Upgrade Option | ROI Benefit | Best For | Considerations |
|---|---|---|---|
| Soft-close/Self-close | Energy efficiency, Safety | Families, offices | Slightly higher upfront cost |
| Heavy-duty/Quiet-glide rollers | Durability, Silence | High traffic areas | Match to door weight |
| Smart hardware | Convenience, Security | Tech-savvy users | Requires compatible systems |
Upgrading from builder-grade to premium kits can boost both performance and property value. Think about your door’s weight, frequency of use, and your style preferences before making the leap. If you want a smoother, quieter, or smarter door track sliding experience, now is the perfect time to upgrade.
So, now that you’ve got the inside scoop on making your sliding doors work like a dream, what’s your next step? If you want that smooth, quiet glide every time—without the headaches of cheap hardware or confusing instructions—why not lean on the pros who’ve been doing this since 2016? Whether you’re tackling a single barn door or upgrading your whole home, you’ll find solid steel kits, expert advice, and real customer success stories at The Barn Door Hardware Store. Plus, with free shipping and a lifetime warranty, you really can’t go wrong. Ready to make your doors glide like new?