
How to Measure for a Barn Door: A Step-by-Step Guide to Getting It Right
Your new barn door arrives. You're excited to install it. Then you realize it's too small—gaps on both sides let light and sound through, completely defeating the purpose of having a door in the first place.
This happens more often than you'd think.
Choosing the wrong size is one of the most common mistakes made during barn door installation, and it stems from one fundamental misunderstanding: measuring for a barn door is entirely different from measuring for a regular swinging door.
With traditional doors, you want an exact fit within the frame. But barn doors slide along the wall surface, sitting in front of the opening rather than inside it. If your barn door is the exact same size as your opening, you'll have gaps that compromise both privacy and aesthetics.
Let's walk through exactly how to measure for a barn door so you get it right the first time.
Why Barn Door Measurements Are Different
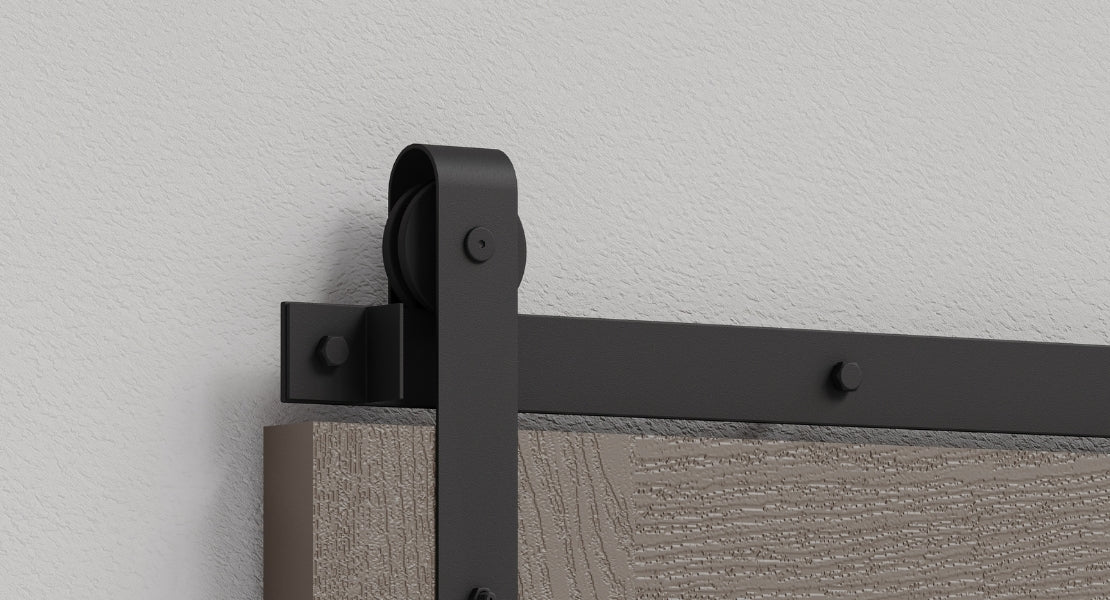
Traditional hinged doors fit snugly within a door jamb, with the frame itself providing the seal. Barn doors, however, slide on a track mounted above the opening, and the door slab hangs in front of the wall.
This means you need overlap—extra width and height beyond the opening dimensions—to ensure the door completely covers the space when closed. Without sufficient overlap, you'll see straight through to the other room at certain angles, and light will pour through the gaps.
Think of it this way: your barn door needs to be bigger than the hole it's covering, unlike regular doors that need to match their opening precisely.
What You'll Need
Before starting, gather these tools:
- Tape measure
- Level (to check floor evenness)
- Pencil
- Paper or notepad
- Step stool (for measuring tall openings)
Step 1: Check Your Space Availability
Before measuring anything else, confirm you actually have room for a barn door installation.
Above the opening: Standard barn door hardware requires 6 to 8 inches of clearance between the top of your opening and the ceiling for the track and rollers. If you're working with crown molding, ductwork, or low ceilings (common in older homes with 7-8 foot ceilings), look into low-profile hardware that needs only 4 inches—or ultra-low profile systems requiring as little as 2 inches.
Besides the opening, you need clear wall space equal to at least the width of your door. When the door slides open, it has to go somewhere.
Mark the door's width on the wall with a pencil to visualize where it will sit when open. Check for light switches, electrical outlets, vents, or other obstructions that would interfere with the door's path.
Step 2: Determine if You Have Trim or Casing
This detail affects how you'll measure.
Door casing (also called trim or molding) is the decorative frame that surrounds many doorways, covering the gap between the door jamb and the wall. If you currently have a hinged door installed, you probably have casing. New construction or pass-through openings often have sheetrocked openings without casing.
Knowing which you have determines where you'll place your tape measure.
Step 3: Measure the Width
Width is the most critical measurement because it determines both your door size and track length.
The measuring process:
- Measure at three points: top of the opening, middle, and bottom
- If you have trim/casing: Measure from the outside edge of the trim on one side to the outside edge on the other
- If you have no trim: Measure from the inside edge of the jamb on one side to the inside edge on the other
- Use the largest of your three measurements
Why three measurements? Because older homes settle over time, creating irregular openings. Your opening might be 36 inches at the top but 36.5 inches at the bottom. Using the largest measurement ensures your door will cover the entire space.
Adding overlap:
- For standard rooms: Add 2 inches minimum (1 inch per side)
- For bathrooms or spaces requiring more privacy: Add 4-6 inches total (2-3 inches per side)
Example: Your opening measures 36 inches at its widest point. Add 2 inches for standard overlap. Your door should be 38 inches wide. For a bathroom, you'd order a 40-42-inch door instead.
Step 4: Measure the Height
Height determines whether your door will adequately cover the top of the opening and clear the floor without dragging.
The measuring process:
- Measure at three points: left side, center, and right side of the opening
- Measure from the floor to the top of the opening (or to the outside edge of trim if present)
- Critical: Measure from the highest point on your floor if it's uneven
- Use the largest of your three measurements
- Add 1 inch to your final measurement
Standard interior doorways are typically 80 inches tall. Using our formula: 80 inches + 1 inch = 81 inches. Your door should be 81 inches tall.
Floor clearance note: Your barn door should hang 1/2 to 1 inch above the floor for smooth operation. This gap prevents the door from dragging across the flooring, which would damage both the door and your floors. If you're installing new flooring (tile, carpet, hardwood), take measurements after the flooring is in place.
Step 5: Calculate Track Length
Your track needs to be long enough for the door to slide completely open, fully exposing the doorway.
The formula is simple: Door width × 2 = minimum track length
Example: You determined you need a 38-inch wide door. 38 × 2 = 76 inches. Your track should be at least 76 inches long.
You can add an extra 4-6 inches to this measurement for aesthetic purposes or easier operation, but never go shorter than the 2x formula. A track that's too short means your door can't open fully—completely defeating the space-saving purpose of installing a barn door in the first place.
Common Barn Door Measuring Mistakes to Avoid
Now that you know the correct process, let's cover the pitfalls that trip people up:
- Not accounting for overlap: A door the exact width of your opening will leave visible gaps. Always add at least 2 inches to your width measurement—more for bathrooms.
- Ignoring trim: Measuring only the drywall-to-drywall space inside your trim leads to undersizing. Plus, as installers note, "your wall trim usually isn't square...if you don't go bigger, this will be noticeable."
- Taking only one measurement: Your opening may not be perfectly square. Measure the width at three heights and the height at three points horizontally. Always use the largest measurement to ensure complete coverage.
- Forgetting about floor unevenness: Measure height from the highest point on your floor. If you measure from a low spot, your door might drag in other areas along its path.
- Insufficient track length: Doubling the door width is the minimum. Any shorter and your door won't open all the way, leaving you with a half-functional installation.
Special Situations
Bathrooms and Privacy Rooms
For spaces requiring maximum privacy, add 4-6 inches to your opening width instead of the standard 2 inches. This extra overlap significantly reduces gaps that allow light, sound, and visual sightlines through. The more overlap you have, the less light and sound will escape.

Double Barn Doors
If you're installing two doors that meet in the middle, each door should be slightly wider than half the opening width. Formula: (Opening width ÷ 2) + 1 inch per door, with 2-3 inches of overlap where the doors meet in the center.
Example: 60-inch opening requires two 32-inch doors (60 + 4 inches overlap = 64 inches ÷ 2 = 32 inches per door).
![]()
Low Ceilings or Crown Molding
Standard hardware needs 6-8 inches of clearance above your opening. If you have crown molding, ductwork, or low ceilings that limit this space, low-profile hardware requires only 4 inches of clearance, and ultra-low-profile systems can work with as little as 2 inches.
Quick Reference: Your Measuring Checklist
✓ Verify 6-8" ceiling clearance (or source low-profile hardware)
✓ Confirm clear wall space beside the opening equal to the door width
✓ Measure opening width at top, middle, bottom—use the largest
✓ Add 2" minimum to width (4-6" for bathrooms)
✓ Measure opening height at left, center, right—use the largest
✓ Measure from the highest floor point
✓ Add 1" to height
✓ Calculate track length: door width × 2
✓ Check for obstructions (switches, outlets, trim)
✓ Account for planned flooring changes
Why This Matters
Getting your measurements right means the difference between a barn door that functions beautifully and one that requires expensive returns, reordering, or living with gaps that compromise the entire installation.
The extra time spent measuring at multiple points and ensuring proper overlap prevents problems after your door arrives. Barn door installations can seem straightforward, but incorrect measurements turn them into frustrating projects requiring professional help to fix.
Measure twice—or better yet, three times at different points—and order once with confidence.
Ready to find the perfect barn door hardware for your correctly-measured space? The Barn Door Hardware Store offers complete hardware kits with everything you need for a smooth installation, from standard track systems to low-profile options for tight clearances.