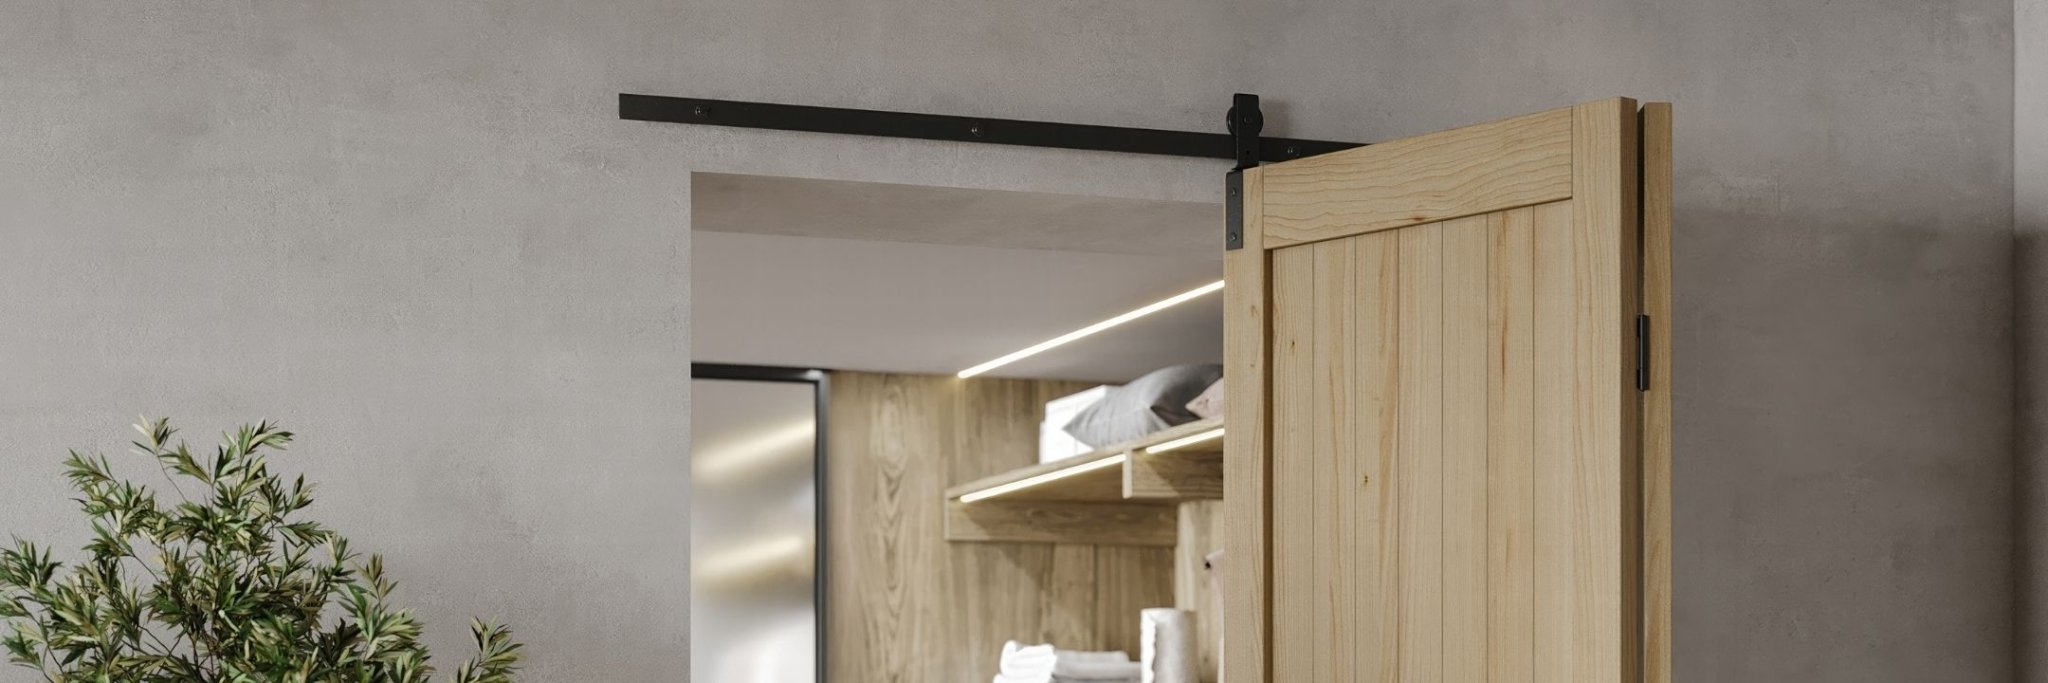
Have you ever struggled with a closet door that swings into your bedroom, eating up precious floor space? Or maybe you've got a pantry that's just too cramped for a traditional door? That's exactly where bifold door kits shine. These space-saving solutions combine the rustic charm of barn doors with the practicality of folding panels, giving you full access to your space without sacrificing style. Whether you're renovating a master closet or updating your laundry room, understanding how these kits work can transform how you think about interior doorways.
What Makes Bifold Door Kits Different from Traditional Barn Doors
Let me share a quick story. Last year, my neighbor Sarah was renovating her 1920s bungalow. She fell in love with the barn door trend but quickly realized her narrow hallway couldn't accommodate a door sliding along the wall. The solution? Bifold door kits.
Unlike standard sliding barn doors that require wall clearance equal to the door width, bifold systems fold panels together as they glide along the track. This means you get that gorgeous farmhouse aesthetic without needing extra wall space. The panels connect with hinges at the center, folding like an accordion while the outer edges travel along the track.
How the Folding Mechanism Works
The magic happens through a combination of components working together:
- Pivot points at the top and bottom of each panel
- Hinges connecting adjacent panels
- Roller hardware that glides smoothly along the track
- Alignment pins that keep everything moving in sync
When you open the door, the panels fold inward or outward (depending on your configuration) while simultaneously sliding. It's like watching a well-choreographed dance between hardware components.

Choosing the Right Configuration for Your Space
Not all bifold door kits are created equal. You've got options ranging from simple two-panel systems to complex eight-panel configurations. Here's how to decide what works for your project.
Two-Panel Systems: The Classic Choice
Perfect for standard closet openings (typically 48 to 72 inches wide), two-panel bifold door kits offer the simplest installation. Each panel folds against the other, creating a compact stack that maximizes your opening width. I installed one of these in my home office closet, and the difference was immediate. Suddenly, I could access both corners without contortions.
The Classic J-Strap Bifold Barn Door Hardware Kit brings that iconic curved roller design to compact spaces, making it ideal for closets and pantries where you want traditional style without the swing radius.
Multi-Panel Configurations: When You Need Wider Coverage
For larger openings like room dividers or commercial applications, you'll want to explore four-panel, six-panel, or even larger systems. These create stunning visual impact while maintaining functionality across wide spans.
| Configuration | Ideal Opening Width | Best Applications | Complexity Level |
|---|---|---|---|
| 2-Panel | 48-72 inches | Closets, pantries, small bathrooms | Beginner |
| 4-Panel Biparting | 96-144 inches | Room dividers, master closets | Intermediate |
| 4-Panel One-Way | 96-120 inches | Wide pantries, laundry rooms | Intermediate |
| 6-Panel+ | 144+ inches | Commercial spaces, large openings | Advanced |
Installation Considerations That Actually Matter
Here's where theory meets reality. I've talked with dozens of homeowners who thought installing bifold door kits would be a weekend project, only to discover unexpected challenges. Let's avoid those pitfalls.
Measuring Your Opening Correctly
You can't just measure the width and call it done. Successful installations require three critical measurements:
- Opening width at the top, middle, and bottom (walls aren't always perfectly straight)
- Opening height on both sides
- Header depth to ensure adequate track mounting space
Add half an inch to your door panel measurements to allow for smooth operation. Tight clearances lead to binding and frustration.
Preparing Your Track Mounting Surface
Your track needs solid support. Period. I learned this the hard way when helping a friend install a kit on drywall alone. Within two weeks, the mounting screws started pulling loose.
The installation process requires proper backing, whether that's a solid header board, wall studs, or blocking between studs. For heavier doors, consider upgrading to lag bolts instead of standard wood screws.
- Use a level to mark your track position perfectly horizontal
- Locate studs or install blocking before you start
- Pre-drill all mounting holes to prevent wood splitting
- Test the track installation with weight before hanging doors
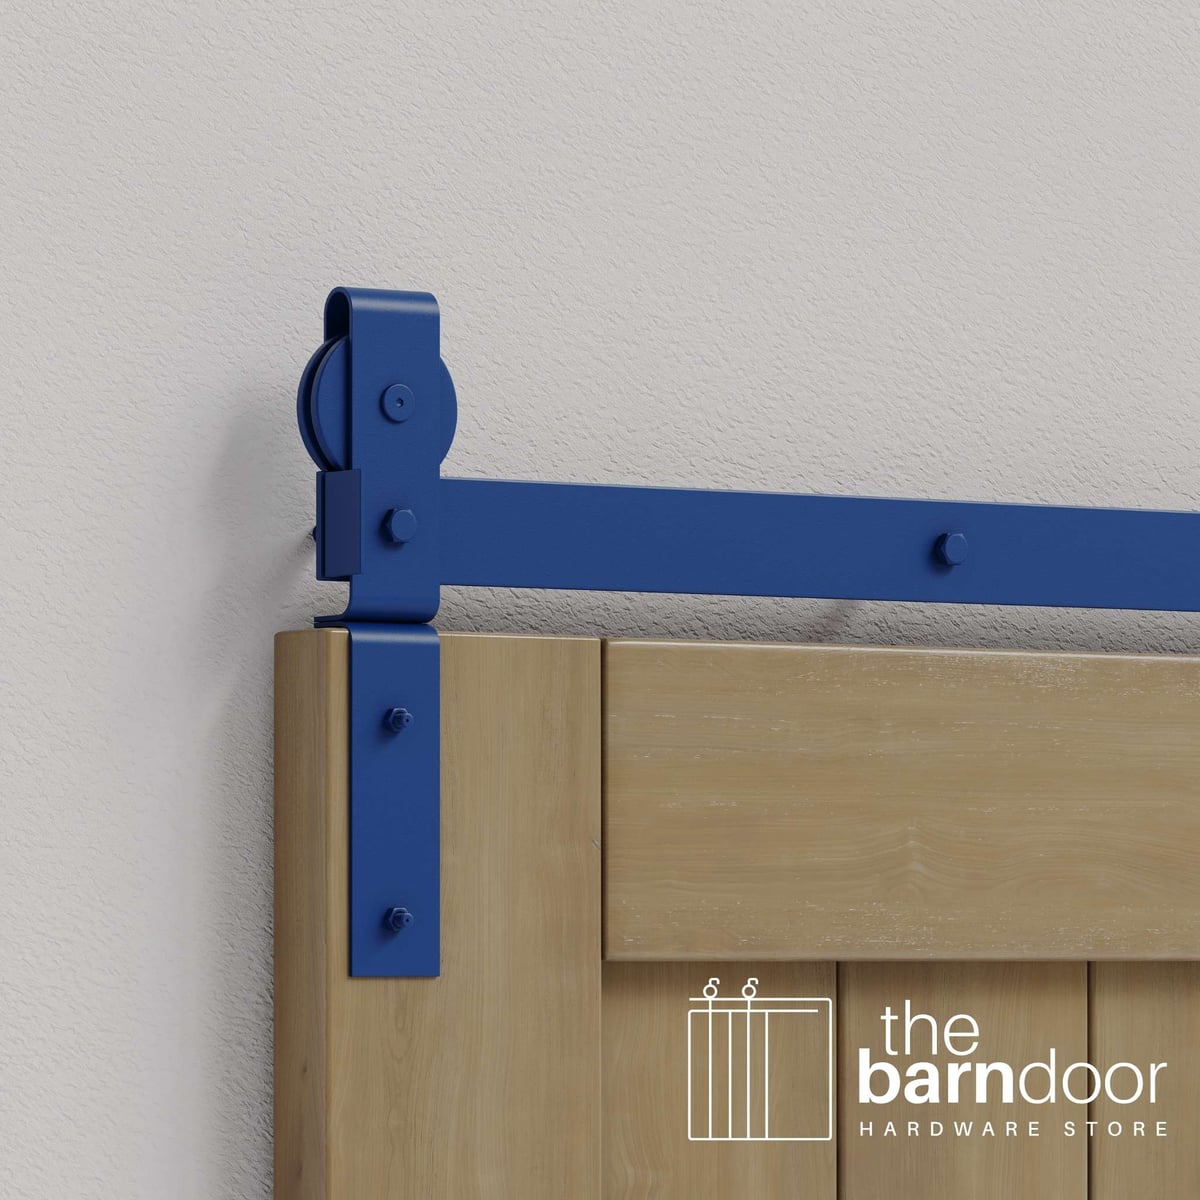
Hardware Quality: Where You Shouldn't Cut Corners
I get it. You're browsing options online, and you see bifold door kits ranging from $150 to $800. The temptation to save money is real. But here's what separates budget hardware from quality systems.
The Components That Define Durability
Premium bifold door kits feature several key upgrades:
Steel vs. Aluminum Construction: Steel tracks and rollers handle heavier doors and resist warping over time. Aluminum works fine for lightweight applications but can bend under stress.
Sealed vs. Open Bearings: Sealed ball bearings keep out dust and debris, maintaining smooth operation for years. Open bearings require frequent cleaning and lubrication.
Adjustable vs. Fixed Pivot Points: Adjustability lets you fine-tune alignment after installation, compensating for settling or minor measurement errors.

Weight Capacity Matters More Than You Think
Standard bifold door kits typically support 100-150 pounds total. That's fine for hollow-core or light solid-core doors. But if you're planning to use reclaimed barn wood or solid hardwood panels, you need heavy-duty systems rated for 200-300 pounds.
A contractor friend once told me about a client who installed beautiful solid walnut bifold doors using economy hardware. Three months later, the rollers cracked. They ended up replacing the entire system. Don't make that mistake.
Style Options That Match Your Vision
Bifold door kits aren't just functional-they're design statements. The hardware style you choose sets the tone for your entire space.
Traditional Farmhouse Aesthetics
The curved J-strap roller design has defined farmhouse style for generations. These kits feature exposed hardware that becomes a focal point, especially in oil-rubbed bronze or matte black finishes. They work beautifully in rustic homes, modern farmhouses, and even industrial lofts seeking that vintage touch.
Contemporary Minimalism
Maybe exposed hardware isn't your thing. Modern bifold systems offer sleeker profiles with minimal visual impact. Some feature top-mounted tracks that hide completely when the door is closed, while others use flat roller designs that blend into contemporary spaces.
For those wanting barn door functionality without traditional hardware prominence, exploring modern barn door hardware options reveals cleaner lines and understated elegance.
Finish Choices Beyond Basic Black
- Oil-rubbed bronze: Warm, traditional, hides fingerprints beautifully
- Matte black: Crisp contrast, works with any décor style
- Brushed nickel: Subtle sophistication for transitional spaces
- Stainless steel: Modern, industrial, incredibly durable
- Antique brass: Vintage charm with rich patina
Real-World Applications That Work
Theory is great, but let's talk about actual installations where bifold door kits solved specific problems.
The Master Closet Transformation
Jessica contacted me after struggling with her master closet's standard hinged doors. The bedroom wasn't large, and the doors swung directly into the walkway between the bed and dresser. Every morning meant a furniture-dodging dance.
She opted for a four-panel biparting bifold system. Now the doors fold neatly to each side, providing complete access to her closet while reclaiming that crucial floor space. The total project cost about $600 for quality hardware and custom doors, but it transformed how she used the room.
Pantry Access That Actually Works
Tom's pantry was deep but narrow-just 36 inches wide. A standard door blocked half the opening when swung open, making it impossible to access items on the opposite side without closing the door first. Ridiculous, right?
A two-panel bifold kit changed everything. The folding panels stack to just 18 inches, giving him full access to both sides simultaneously. He mentioned that grocery unloading time dropped by half because he could actually see and reach everything at once.
Laundry Room Privacy Without Sacrifice
In smaller homes, laundry rooms often open directly to living spaces. Sarah wanted to hide the washer and dryer without permanently closing off the room, which needed airflow during operation.
She installed a three-panel bifold system that could stay fully open during laundry days but fold closed when guests visited. The panels featured frosted glass inserts, adding architectural interest while maintaining some visual separation even when open.
Maintenance That Keeps Everything Running Smoothly
Installing bifold door kits is just the beginning. Proper maintenance ensures they operate smoothly for decades.
Monthly Quick Checks
Set a reminder on your phone for the first of each month. It takes five minutes:
- Wipe down the track with a damp cloth to remove dust and debris
- Check that all mounting screws remain tight
- Verify panels hang level and aligned
- Test the full opening and closing motion
Addressing small issues early prevents major headaches later. Regular cleaning of tracks keeps rollers moving freely and prevents premature wear.
Quarterly Deep Maintenance
Every three months, dedicate 30 minutes to thorough care:
- Lubricate all moving parts using silicone-based spray lubricant (never WD-40, which attracts dust)
- Inspect roller wheels for flat spots or cracks
- Check hinges for looseness or squeaking
- Test alignment and adjust pivot points if needed
The importance of regular lubrication can't be overstated. Those roller bearings need attention to maintain their smooth glide.
Annual Professional-Level Service
Once a year, perform a comprehensive inspection:
| Component | What to Check | Action if Needed |
|---|---|---|
| Track | Straightness, mounting security | Tighten or reinstall |
| Rollers | Bearing smoothness, wheel wear | Replace if rough or cracked |
| Pivots | Adjustment range, security | Lubricate and tighten |
| Hinges | Pin condition, door gap consistency | Replace worn pins |
| Hardware finish | Corrosion, wear patterns | Touch up or replace |
Troubleshooting Common Issues Before They Become Problems
Even with quality hardware and proper installation, issues occasionally arise. Here's how to address them quickly.
Doors Won't Glide Smoothly
This is the most common complaint. Usually, it stems from one of three causes:
Track debris: Even small particles can obstruct roller movement. Clean thoroughly with a vacuum nozzle first, then wipe with a cloth.
Dry bearings: Roller bearings need periodic lubrication. Apply silicone spray to each roller assembly while moving the door back and forth.
Misalignment: If panels don't hang perfectly vertical, they bind against each other. Adjust the pivot points until doors hang plumb.
Panels Won't Stay Folded Open
When bifold panels swing closed on their own, it's usually an alignment issue. The track might not be perfectly level, or pivot points need adjustment. Use a long level to verify the track, then adjust mounting positions if necessary.
Hardware Finishes Showing Wear
High-traffic installations take their toll on finishes. While proper maintenance helps, some wear is inevitable. Consider upgrading to stainless steel or powder-coated finishes for high-use areas.
- Touch up scratches with matching touch-up paint
- Replace heavily worn components rather than entire kits
- Clean finishes with appropriate cleaners (avoid abrasives)
Pairing Bifold Kits with Complementary Hardware
Your bifold door kit is the star, but supporting hardware elevates the entire installation.
Handle and Pull Options
Since bifold panels fold together, traditional round knobs don't work well. Instead, consider:
Flush pulls: These mount into recessed pockets, sitting perfectly flush with the door surface when closed. Ideal for tight spaces where protruding hardware could catch clothing or bump walls.
Vertical bar pulls: Mounted vertically on the edge panel, these provide excellent grip and add visual height to your doors.
Cup pulls: Similar to flush pulls but with a rounded cup design, offering easier grip while maintaining a low profile.
Exploring barn door handles reveals how the right pull transforms functionality into a design feature.
Floor Guides for Stability
While bifold systems rely primarily on top-mounted tracks, floor guides prevent bottom panels from swaying. These small components make a huge difference in perceived quality.
Adjustable guides: Allow fine-tuning to accommodate floor irregularities.
Recessed guides: Mount flush with the floor, eliminating trip hazards while maintaining panel alignment.
Lock and Latch Solutions
Privacy matters in bathrooms and bedrooms. Bifold-compatible locks include:
- Edge-mounted privacy locks that work with folding panels
- Magnetic catches that hold panels closed without complex mechanisms
- Hook-and-eye latches for simple, reliable security
Cost Considerations and Budget Planning
Let's talk numbers. Quality bifold door kits represent an investment, but understanding pricing helps you budget appropriately.
Hardware Kit Pricing Ranges
Budget options ($150-300): Basic aluminum tracks, standard rollers, minimal adjustability. Fine for lightweight doors in low-traffic areas.
Mid-range systems ($300-600): Steel construction, sealed bearings, better finishes, adjustable components. The sweet spot for most residential installations.
Premium kits ($600-1200+): Heavy-duty capacity, commercial-grade components, lifetime warranties, superior finishes. Worth it for high-traffic areas or heavy custom doors.
Door Panel Costs
Don't forget the doors themselves. Your options include:
| Door Type | Price Range (per panel) | Best For |
|---|---|---|
| Hollow-core | $40-80 | Closets, light-duty applications |
| Solid-core | $100-200 | Standard residential use |
| Reclaimed wood | $200-500+ | Statement pieces, rustic designs |
| Custom hardwood | $300-800+ | Luxury installations |
Professional Installation vs. DIY
Installation costs typically run $200-500 for professional contractors, depending on complexity and regional rates. DIY saves money but requires tools, time, and confidence working with precise measurements.
I'd suggest DIY for straightforward two-panel installations if you're comfortable with basic carpentry. For complex multi-panel systems or challenging installations, professional help prevents costly mistakes.
Planning Your Bifold Door Project from Start to Finish
Ready to transform your space? Here's a practical roadmap that's worked for countless successful installations.
Step 1: Assess Your Space Honestly
Measure three times, order once. Document your opening dimensions, check for level surfaces, and identify any obstacles like light switches or trim that might interfere.
Step 2: Choose Your Style Direction
Browse inspiration photos, visit showrooms, and consider how your bifold doors will integrate with existing décor. Are you enhancing farmhouse charm or adding modern functionality?
Step 3: Select Hardware First, Doors Second
This might seem backward, but choosing your hardware kit first ensures your door panels will work with the system's specifications. You'll know exact thickness requirements, weight limits, and mounting considerations.
Step 4: Prepare Your Installation Area
Install blocking, paint or stain your header area (if visible), and gather all tools before starting. Rushing preparation leads to mistakes.
Step 5: Follow Manufacturer Instructions Carefully
Every bifold door kit has specific installation requirements. Following proper installation procedures prevents the frustration of disassembling and starting over.
- Install track first, ensuring perfect level
- Mount pivot brackets according to specifications
- Hang panels starting with the lead panel
- Adjust all pivot points for smooth operation
- Install floor guides last

Step 6: Test and Adjust Before Final Use
Run the doors through 10-15 complete cycles, making minor adjustments to pivot points and track alignment. This break-in period reveals issues while they're still easy to fix.
Environmental and Sustainability Considerations
In 2026, more homeowners care about their renovation projects' environmental impact. Bifold door kits can align with sustainable building practices.
Choosing Eco-Friendly Materials
Look for hardware manufactured using recycled steel or aluminum. Many quality manufacturers now offer products with significant recycled content percentages without sacrificing durability.
For door panels, consider:
- Reclaimed wood from old barns or demolished buildings
- FSC-certified lumber from responsibly managed forests
- Bamboo panels offering rapid renewability
- Recycled composite materials combining wood fiber with recycled plastics
Longevity as Sustainability
The most sustainable choice is hardware that lasts decades rather than requiring replacement every few years. Quality bifold door kits with proper maintenance can function smoothly for 20-30 years, reducing material consumption and waste.
Future-Proofing Your Installation
Think beyond today's needs. How might your space evolve over the next decade?
Accessibility Considerations
Bifold systems work well for aging-in-place designs. They require minimal effort to operate and don't create the threshold challenges of traditional swinging doors. However, ensure your chosen kit offers smooth, easy operation for users with limited hand strength.
Adaptability for Changing Needs
Installing a slightly over-rated system (higher weight capacity than currently needed) provides flexibility if you later want to swap in heavier custom doors. The marginal cost difference now prevents complete hardware replacement later.
Smart Home Integration
While most bifold door kits operate manually, some modern systems accept motorized openers. If smart home integration interests you, verify your chosen hardware can accommodate future automation.
The Role of Professional Support and Warranties
Even experienced DIYers occasionally need expert guidance. Understanding what support comes with your bifold door kits makes the difference between frustration and success.
What Good Warranty Coverage Includes
Quality manufacturers stand behind their products with comprehensive warranties:
- Limited lifetime warranties on structural components
- 5-10 year coverage on rollers and moving parts
- Finish warranties protecting against peeling or corrosion
- Free replacement for defective components
Expert Installation Support
Family-owned businesses specializing in barn door hardware typically offer installation guidance that big-box retailers can't match. Access to knowledgeable staff who've seen countless installations helps you avoid common pitfalls.
Maintenance and Troubleshooting Resources
Look for companies providing detailed maintenance guides, video tutorials, and responsive customer service. When you encounter an issue at 8 PM on a Saturday, clear documentation becomes invaluable.
Making the Final Decision
You've researched options, measured your space, and explored styles. Now it's decision time.
Prioritizing Your Must-Haves
Create a simple hierarchy of requirements:
Non-negotiable: Weight capacity, opening width, basic functionality
Important: Specific finish, adjustability features, warranty length
Nice-to-have: Premium finishes, brand name, advanced features
This framework prevents getting overwhelmed by options while ensuring your chosen bifold door kits meet core requirements.
Timing Your Purchase and Installation
Consider seasonal factors. Summer humidity can affect door panel dimensions, while winter heating creates drier conditions. Spring and fall offer moderate conditions ideal for installation.
Order hardware 2-3 weeks before you need it, allowing time for delivery and addressing any shipping issues. Order custom doors 4-6 weeks ahead, as fabrication takes time.
Working Within Your Budget Without Compromise
If premium kits exceed your budget, consider these strategies:
- Install hardware now with budget-friendly doors, upgrading panels later
- Choose a smaller configuration initially, expanding if needs grow
- Invest in quality hardware but handle installation yourself
- Look for package deals combining hardware with complementary accessories
Quality bifold barn door kits represent an investment in your home's functionality and style, one that pays dividends through years of reliable operation.
Bifold door kits solve real problems in real homes, transforming cramped spaces into functional showcases while adding architectural interest. Whether you're tackling a closet renovation or planning a whole-home update, the right hardware makes all the difference. Since 2016, The Barn Door Hardware Store has helped thousands of homeowners find the perfect bifold systems for their projects, backed by expert guidance, quality American-made products, and a limited lifetime warranty. Ready to reclaim your space with style?
