Have you ever opened a closet door and wished it didn't swing into your bedroom, eating up precious floor space? Or maybe you've dreamed of creating a dramatic entryway between your living room and kitchen? That's exactly where sliding door kits come into play. These complete hardware systems have transformed how homeowners think about interior doors, offering both aesthetic appeal and practical space-saving solutions. Whether you're tackling a weekend DIY project or planning a whole-home renovation, understanding what goes into these kits can save you time, money, and a whole lot of frustration.
What Makes Sliding Door Kits Different From Regular Hardware
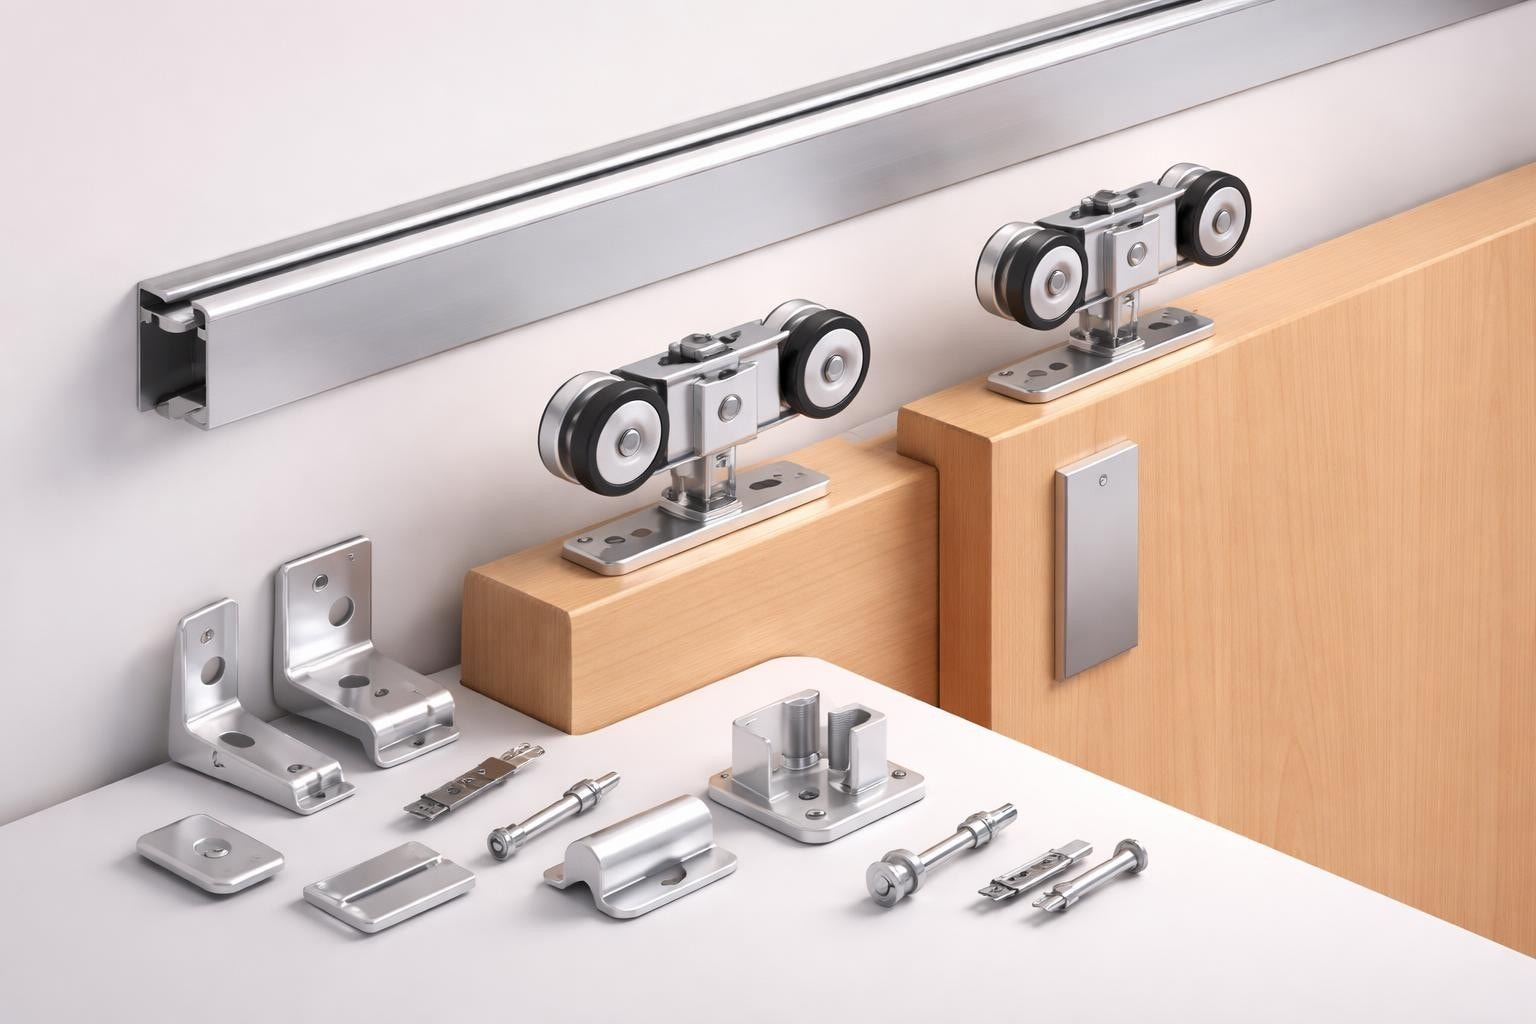
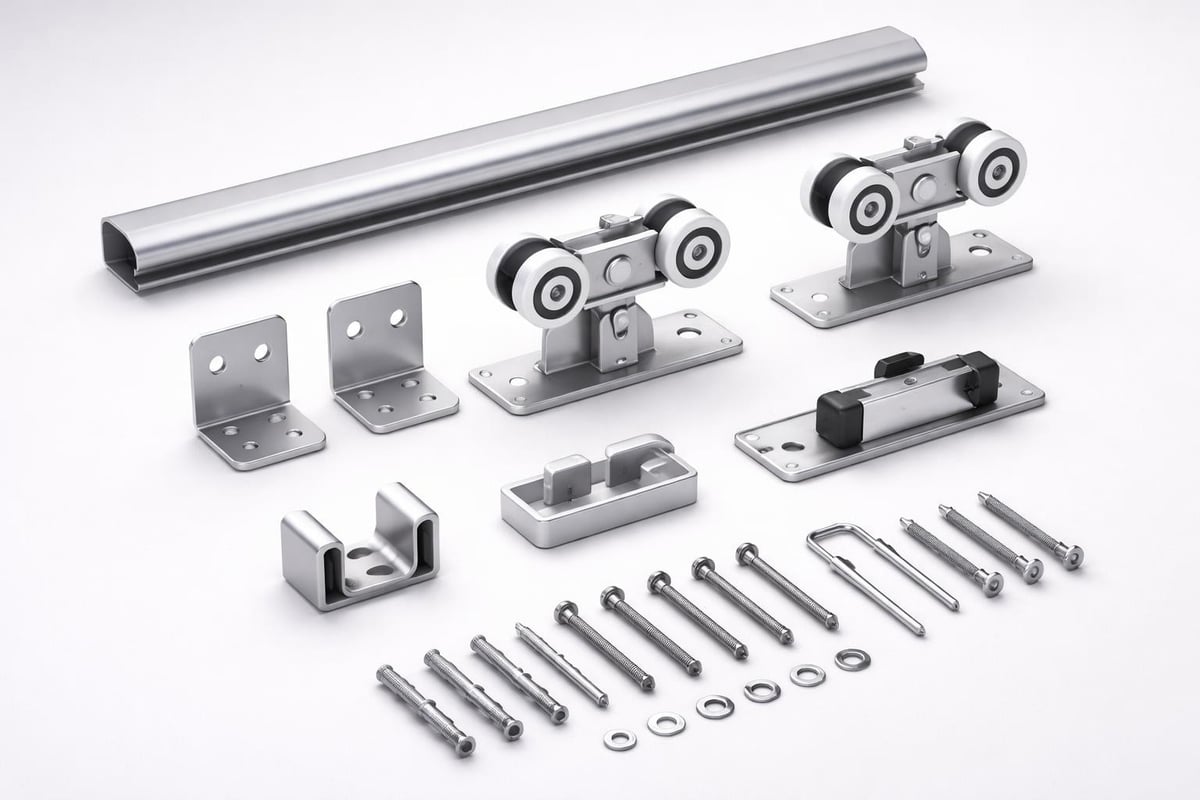
When you're shopping for door solutions, you'll quickly notice that sliding door kits offer something unique compared to buying individual components. A complete kit bundles everything you need in one package: the track, rollers, mounting brackets, floor guides, and often even the screws and spacers.
Think of it like buying a recipe kit versus shopping for individual ingredients. Sure, you could source each piece separately, but you'd risk compatibility issues, multiple shipping charges, and the headache of making sure everything works together.
The Core Components You'll Find
Every quality sliding door kit includes several essential elements that work in harmony:
- Track system: The horizontal rail that guides your door's movement
- Roller assemblies: The wheels that attach to your door and glide along the track
- Mounting hardware: Brackets, screws, and spacers to secure everything to your wall
- Floor guides: Small guides that keep the door bottom aligned and prevent swinging
- Installation instructions: Step-by-step guidance specific to that hardware style
The beauty of a comprehensive kit is that the manufacturer has already done the engineering work. They've tested these components together, verified weight capacities, and ensured smooth operation.
Different Types of Sliding Door Kits for Every Space
Not all sliding door kits serve the same purpose, and that's actually a good thing. Your pantry needs different hardware than your barn-style master bedroom entrance. Let's break down the most common configurations you'll encounter.
Single Track Traditional Kits
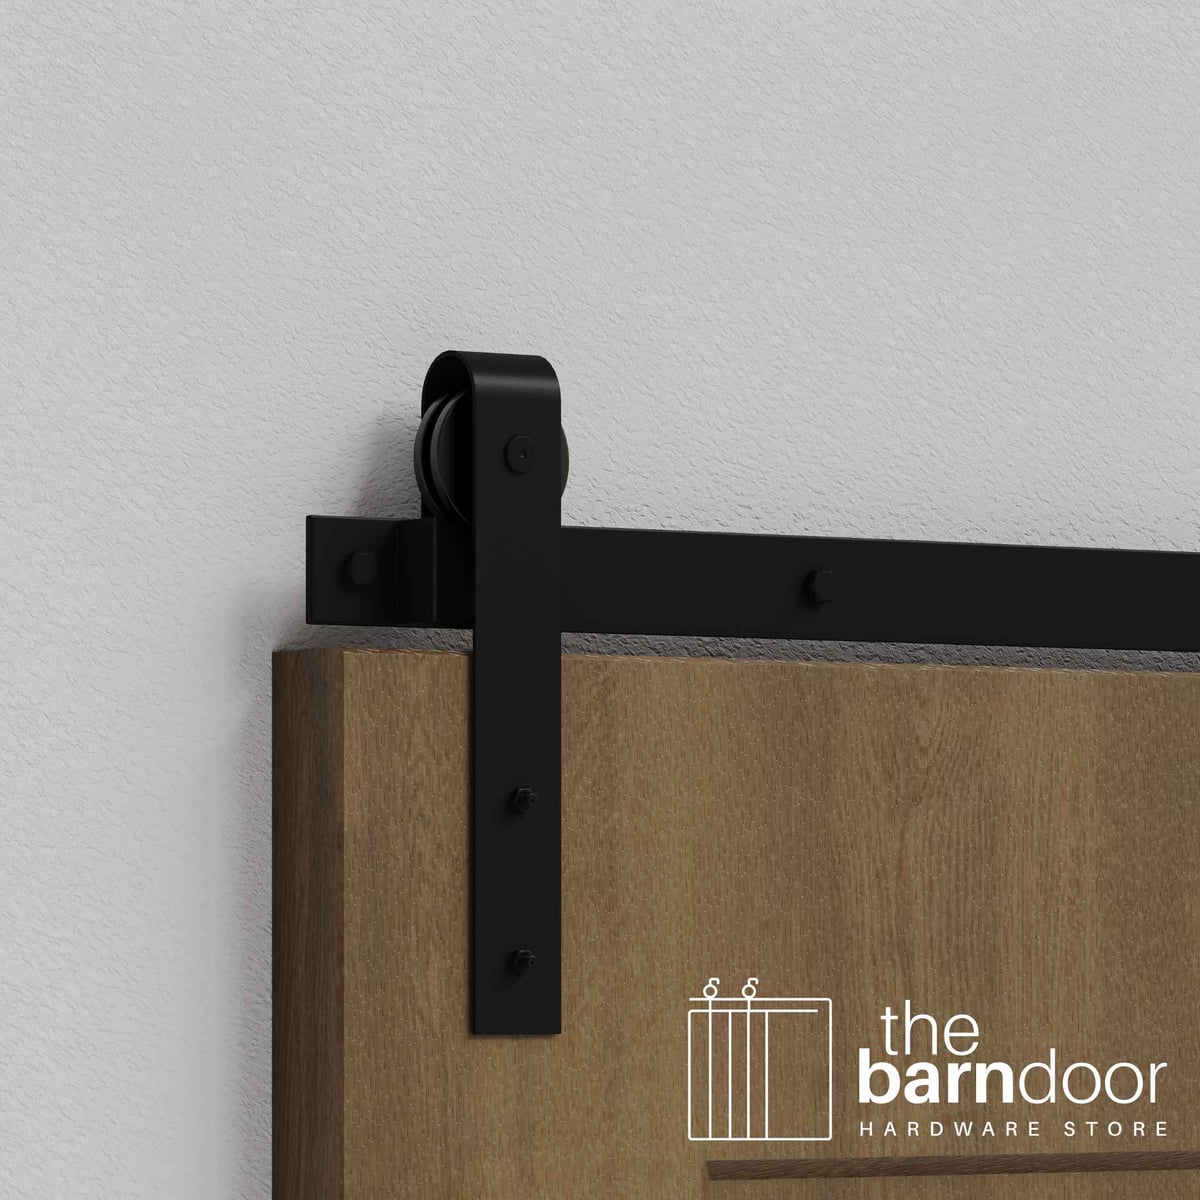
This is the classic barn door setup most people picture. One door slides along one track, typically mounted above the doorway. These single track traditional kits work beautifully for bedrooms, bathrooms, or any space where you want that authentic farmhouse aesthetic.
My neighbor Sarah installed one of these in her daughter's bedroom last summer. The room was small, and a traditional swinging door made furniture arrangement nearly impossible. The sliding door freed up an entire corner for a reading nook.
Bypass and Double Door Configurations
When you have a wider opening like a closet or large doorway, bypass door kits let two doors slide past each other on parallel tracks. According to Hager Companies' sliding door hardware catalog, bypass systems are particularly popular in commercial applications where space efficiency is paramount.
| Kit Type | Best For | Track Configuration | Typical Opening Size |
|---|---|---|---|
| Single Track | Standard doorways | 1 rail, 1 door | 30-40 inches |
| Bypass | Wide closets | 2 parallel rails | 48-96 inches |
| Bifold | Space-limited areas | 1 rail, 2+ panels | 24-72 inches |
| Heavy-Duty | Oversized doors | Reinforced rail | Varies by weight |
Bifold Sliding Systems
Here's where things get really interesting. Bifold kits combine the space-saving benefits of folding doors with the smooth glide of sliding hardware. The panels fold at hinges while traveling along the track, making them perfect for tight spaces where even a sliding door might protrude too far.
I recently helped a friend install a bifold hardware kit in his laundry room. The space between his washer and the opposite wall was only about four feet. A standard sliding door would have blocked access to the machines, but the bifold system folded the panels neatly to the side.
Choosing the Right Sliding Door Kits for Your Project
So you're convinced that sliding door kits are the way to go. Great! But how do you actually choose the right one? The decision involves more than just picking your favorite style.
Weight Capacity Matters More Than You Think
This is where many DIYers run into trouble. They fall in love with a particular hardware style without checking whether it can support their door's weight. A solid wood door can easily weigh 80-150 pounds, while hollow-core doors might only be 30-50 pounds.
Key weight considerations:
- Measure your door's actual weight (use a bathroom scale)
- Add 20% buffer for long-term reliability
- Verify the kit's rated capacity exceeds your total
- Consider future door replacement possibilities
Most quality kits specify their weight rating clearly. Don't assume "it'll probably be fine." I learned this the hard way when a friend's cousin installed budget hardware on a heavy reclaimed wood door. Three months later, the rollers were grinding and the door barely moved.
Material Quality and Durability
The materials used in sliding door kits vary dramatically across price points. Knape & Vogt's sliding door hardware buyer's guide emphasizes that track material significantly impacts both performance and longevity.
Steel tracks offer excellent strength and durability, especially for heavier doors. Aluminum provides a lightweight option that resists corrosion, perfect for bathroom installations where humidity is a concern. Stainless steel combines the best of both worlds but comes at a premium price point.
The Classic J-Strap Barn Door Hardware Kit exemplifies American-made quality that supports doors up to 200 pounds while maintaining that timeless curved design that works in both rustic and contemporary spaces.
Aesthetic Considerations and Design Styles
Your hardware isn't just functional; it's a design element. The visible track and rollers create visual interest and contribute to your home's overall style narrative.
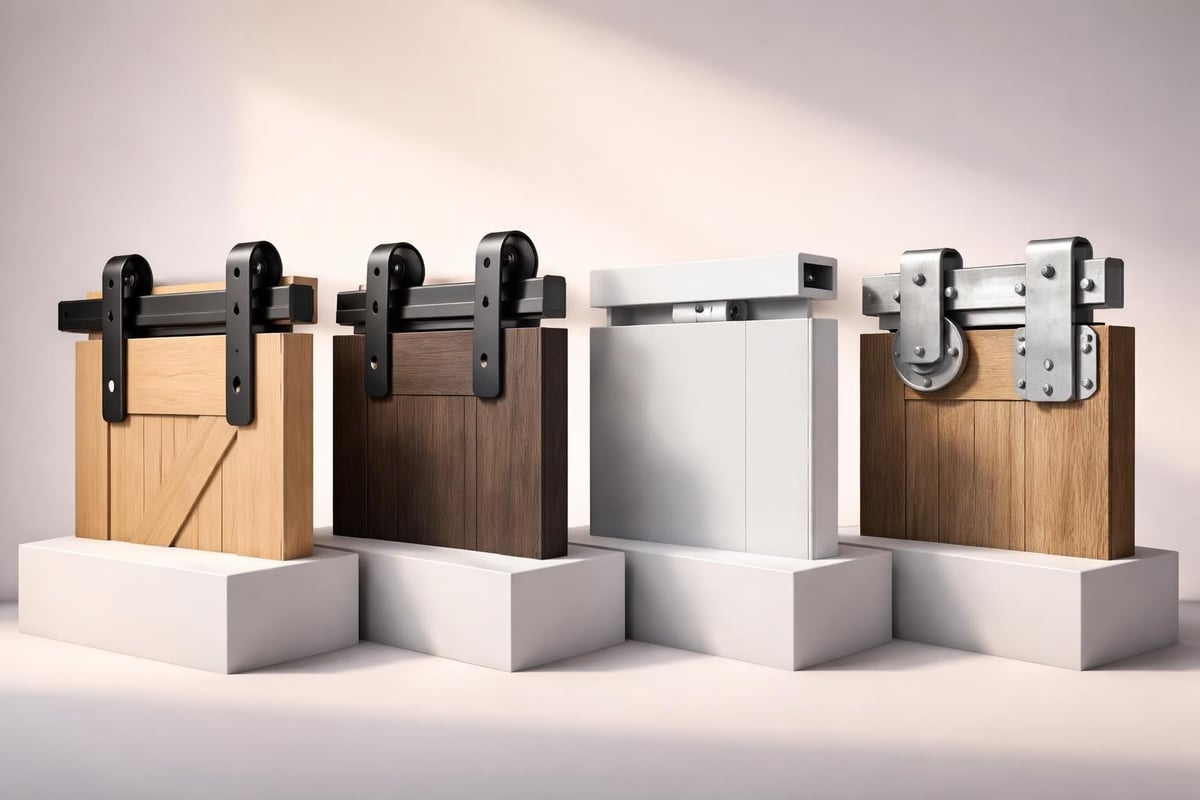
Popular design aesthetics include:
- Farmhouse: Traditional straps, curved brackets, classic black or matte finishes
- Industrial: Exposed hardware, raw steel, pipe-inspired elements
- Modern: Sleek profiles, hidden rollers, minimal visual presence
- Western: Heavy-duty construction, rustic finishes, oversized components
According to historical context on sliding doors, these systems have evolved from purely functional barn applications to become statement pieces in modern interior design.
Installation Considerations That Save Headaches Later
You've selected your kit, and it's sitting in your garage ready to install. Before you grab your drill, let's talk about what separates a smooth installation from a weekend-ruining disaster.
Wall Structure and Support Requirements
Not all walls are created equal when it comes to supporting sliding door kits. The track and door create dynamic loads that differ significantly from static wall hangings.
For drywall installations, you absolutely must anchor into wall studs. Some installers try to use heavy-duty drywall anchors as a shortcut. Don't do this. The constant movement and weight will eventually tear them out.
If your studs don't align with your desired door position, you have two options:
- Install a header board across multiple studs to create a mounting surface
- Adjust your door placement to align with available studs
Header boards are actually the preferred method even when studs align perfectly. They distribute weight more evenly and make installation easier since you're not hunting for stud centers.
Measuring and Planning Your Space
Here's a measuring story that might save you from an expensive mistake. A contractor friend once measured a doorway at 36 inches and ordered hardware accordingly. When the kit arrived, he realized he'd measured the door opening, not accounting for the 2-4 inches the door needs to slide past the opening on each side.
Essential measurements you need:
- Door width and height
- Wall space available on one or both sides
- Distance from ceiling to top of door opening
- Floor to ceiling height
- Door thickness
For building a sliding door from scratch, these measurements become even more critical since you're creating the door to fit the hardware rather than adapting hardware to an existing door.
Tools and Skills Required
Most sliding door kits are genuinely DIY-friendly, but you need the right tools and realistic expectations about the skill level required.
| Required Tools | Optional But Helpful | Nice to Have |
|---|---|---|
| Power drill | Stud finder | Level (4-6 feet) |
| Drill bits | Socket wrench | Measuring tape |
| Screwdriver | Clamps | Pencil |
| Safety glasses | Helper/second person | Step ladder |
The actual installation typically takes 2-4 hours for a single door system, depending on your experience level. Factor in extra time if you need to install a header board or make adjustments to your door.
Common Mistakes People Make With Sliding Door Kits
Even with complete kits and clear instructions, certain mistakes pop up repeatedly. Learning from others' errors beats learning from your own, so let's walk through the biggest pitfalls.
Skipping the Mock-Up Phase
Professional installers rarely skip this step, but DIYers often do. Before drilling a single hole, hold the track in position and mark everything. Slide the door along mentally. Check clearances. Verify the position looks right aesthetically.
I watched my brother-in-law skip this step last year. He mounted the track, installed the door, and discovered it blocked a wall sconce he'd forgotten about. Moving the track meant filling holes and repainting.
Ignoring Door Clearance Needs
Your door needs clearance from the floor, typically 1/2 to 1 inch. This gap prevents carpet interference and allows the floor guide to work properly. Too little clearance and your door drags or catches. Too much clearance and the floor guide can't stabilize the door bottom.
Weather variations matter too. Wood doors expand and contract with humidity changes. That perfect summer installation might cause winter dragging when your door swells slightly.
Overtightening Hardware
This seems counterintuitive. Wouldn't tighter be more secure? Not with sliding door kits. Overtightened rollers create excessive friction, making your door hard to move and accelerating wear on the wheels.
Considerations when choosing sliding door systems include understanding that smooth operation requires properly calibrated tension. Follow manufacturer torque specifications if provided.
Maintenance and Long-Term Care
Your sliding door kit isn't a "set it and forget it" installation. Regular maintenance keeps everything operating smoothly for years.
Cleaning and Lubrication Schedule
Every 3-6 months, wipe down your track with a dry cloth to remove dust and debris. Even small particles can create resistance or grinding sounds. For the rollers, a tiny drop of silicone lubricant annually keeps them spinning freely.
Avoid oil-based lubricants, which attract dirt and can actually cause more problems than they solve. The sliding door hardware options from Knape & Vogt often come with specific lubrication recommendations in their documentation.
Maintenance checklist:
- Inspect roller wheels for wear or damage (quarterly)
- Check mounting screws for looseness (every 6 months)
- Clean track thoroughly (every 3-6 months)
- Apply appropriate lubricant to rollers (annually)
- Verify floor guide alignment (as needed)
Troubleshooting Common Issues
Doors that stick, wobble, or make noise are trying to tell you something. A sticking door usually indicates debris in the track or a misaligned roller. Wobbling suggests a loose mounting bracket or worn floor guide. Grinding noises often mean the rollers need cleaning or replacement.
The fix is usually straightforward once you identify the cause. I helped my sister diagnose a grinding sound in her pantry door last month. Turned out her kids had dropped cereal in the track, and crumbs were interfering with the rollers. Two minutes with a vacuum solved it.
Upgrading and Customizing Your System
Once you understand the basics of sliding door kits, you might want to add some upgrades or customize the system to better fit your needs.
Soft-Close Mechanisms
Standard kits let the door glide freely, which means it can slam if pushed too hard. Soft-close attachments use hydraulic dampeners or spring mechanisms to slow the door gently as it approaches the end of its travel.
These attachments are particularly valuable in homes with kids who tend to shove doors forcefully, or in bedrooms where late-night bathroom trips shouldn't wake your partner.
Decorative Hardware Additions
Beyond the functional components, you can enhance your sliding door's appearance with complementary barn door handles that match your hardware finish. Some homeowners add decorative accessories like custom track covers or artistic floor guides that double as design elements.
The key is maintaining visual cohesion. Mixing finishes intentionally can work in eclectic spaces, but make sure it looks deliberate rather than mismatched.
Privacy and Sound Dampening
Standard sliding door kits don't create the same seal as hinged doors, which can be an issue for bathrooms or bedrooms. You can add brush seals or rubber gaskets along the door edges to improve privacy and reduce sound transmission.
For maximum soundproofing, some installers add mass-loaded vinyl to the back of the door or install double-layer doors. K.N. Crowder's presentation on sliding door systems covers various configuration options for specialized requirements.
Cost Considerations and Budget Planning
Let's talk numbers. What should you actually expect to spend on sliding door kits, and where does your money go?
Price Ranges and What They Include
Entry-level kits start around $80-150 and typically include basic roller systems, standard steel tracks, and essential mounting hardware. These work fine for lightweight doors in low-traffic areas.
Mid-range options ($150-350) often feature better materials, higher weight capacities, and smoother roller mechanisms. This is the sweet spot for most residential applications.
Premium kits ($350-800+) offer specialized finishes, heavy-duty construction, advanced features like soft-close, and often come with extended warranties.
| Price Range | Typical Features | Best Applications | Expected Lifespan |
|---|---|---|---|
| $80-150 | Basic rollers, standard track | Lightweight doors, low traffic | 5-8 years |
| $150-350 | Quality materials, mid-weight capacity | Standard residential use | 10-15 years |
| $350-800+ | Premium finishes, heavy-duty, soft-close | High-traffic, architectural features | 15-20+ years |
Hidden Costs to Consider
The kit price is just the beginning. You might need additional materials:
- Header board lumber if your studs don't align
- Wood stain or paint to finish the header board
- Longer screws if your wall has thick drywall or plaster
- Door modifications like planing or trimming
- Professional installation if DIY isn't your thing
Installation labor typically runs $150-400 depending on your location and the complexity of the project. Factor this in if you're not confident in your carpentry skills.
Return on Investment
Here's something most people don't consider: sliding door kits can actually increase your home's value. Real estate agents report that distinctive architectural features, especially in kitchens and master suites, create memorable impressions during showings.
A well-executed sliding door installation projects craftsmanship and attention to design detail. It signals to buyers that the home has been thoughtfully updated.

Working With Professional Installers Versus DIY
You've got to make a decision: tackle this yourself or hire a pro? Both approaches have merit depending on your situation.
When DIY Makes Sense
If you're comfortable with basic carpentry, have the necessary tools, and enjoy weekend projects, most sliding door kits are absolutely DIY-friendly. The instructions have improved dramatically over the years, with many manufacturers now providing video tutorials and customer support.
DIY saves you installation costs, gives you complete control over timing, and provides a genuine sense of accomplishment. Plus, you'll know exactly how everything was installed if you ever need to make adjustments or repairs.
When to Call a Professional
Complex situations warrant professional help:
- Structural modifications needed: Moving walls, creating new openings, or working with load-bearing walls requires expertise
- Precision custom work: If you're installing expensive custom doors or rare materials
- Multiple systems: Installing several doors throughout your home benefits from professional efficiency
- Time constraints: When you need it done quickly and correctly the first time
Professional installers bring experience that helps them spot potential issues before they become problems. They've seen hundreds of installations and know the workarounds for unusual situations.
Sliding door kits have revolutionized how we think about interior doorways, combining functionality with striking visual appeal in ways that traditional hinged doors simply can't match. Whether you're working with a compact closet or creating a dramatic room divider, the right kit transforms both the space and how you use it. The Barn Door Hardware Store has been helping homeowners and contractors find the perfect sliding door solutions since 2016, offering quality hardware backed by expert guidance, free shipping across the continental US, and a limited lifetime warranty that ensures your investment stands the test of time.
