You've picked out the perfect barn door style, scrolled through countless hardware finishes, and you're ready to transform your space. But before you click "order," there's one crucial step that determines whether your project becomes a DIY success story or a frustrating do-over: getting accurate measurements. Learning how to measure for barn door hardware isn't just about avoiding returns-it's about ensuring your door glides smoothly, looks proportional, and functions flawlessly for years to come. Let me walk you through this process like I would explain it to a friend tackling their first barn door installation.
Why Accurate Measurements Make or Break Your Project
I learned this lesson the hard way back in 2019 when I helped my sister install her first barn door. We eyeballed the measurements, assumed "close enough" would work, and ended up with a track that was too short and a door that left a gap you could see through. We had to reorder everything.
Precise measurements prevent three common disasters:
- Ordering hardware that doesn't fit your space
- Creating gaps that compromise privacy
- Installing tracks that interfere with light switches or outlets
When you know how to measure for barn door hardware correctly, you're setting yourself up for a smooth installation experience. You'll order the right components the first time, and your finished door will look professionally installed rather than cobbled together.
The good news? The measuring process follows a logical sequence that anyone can master with a tape measure and about 15 minutes.
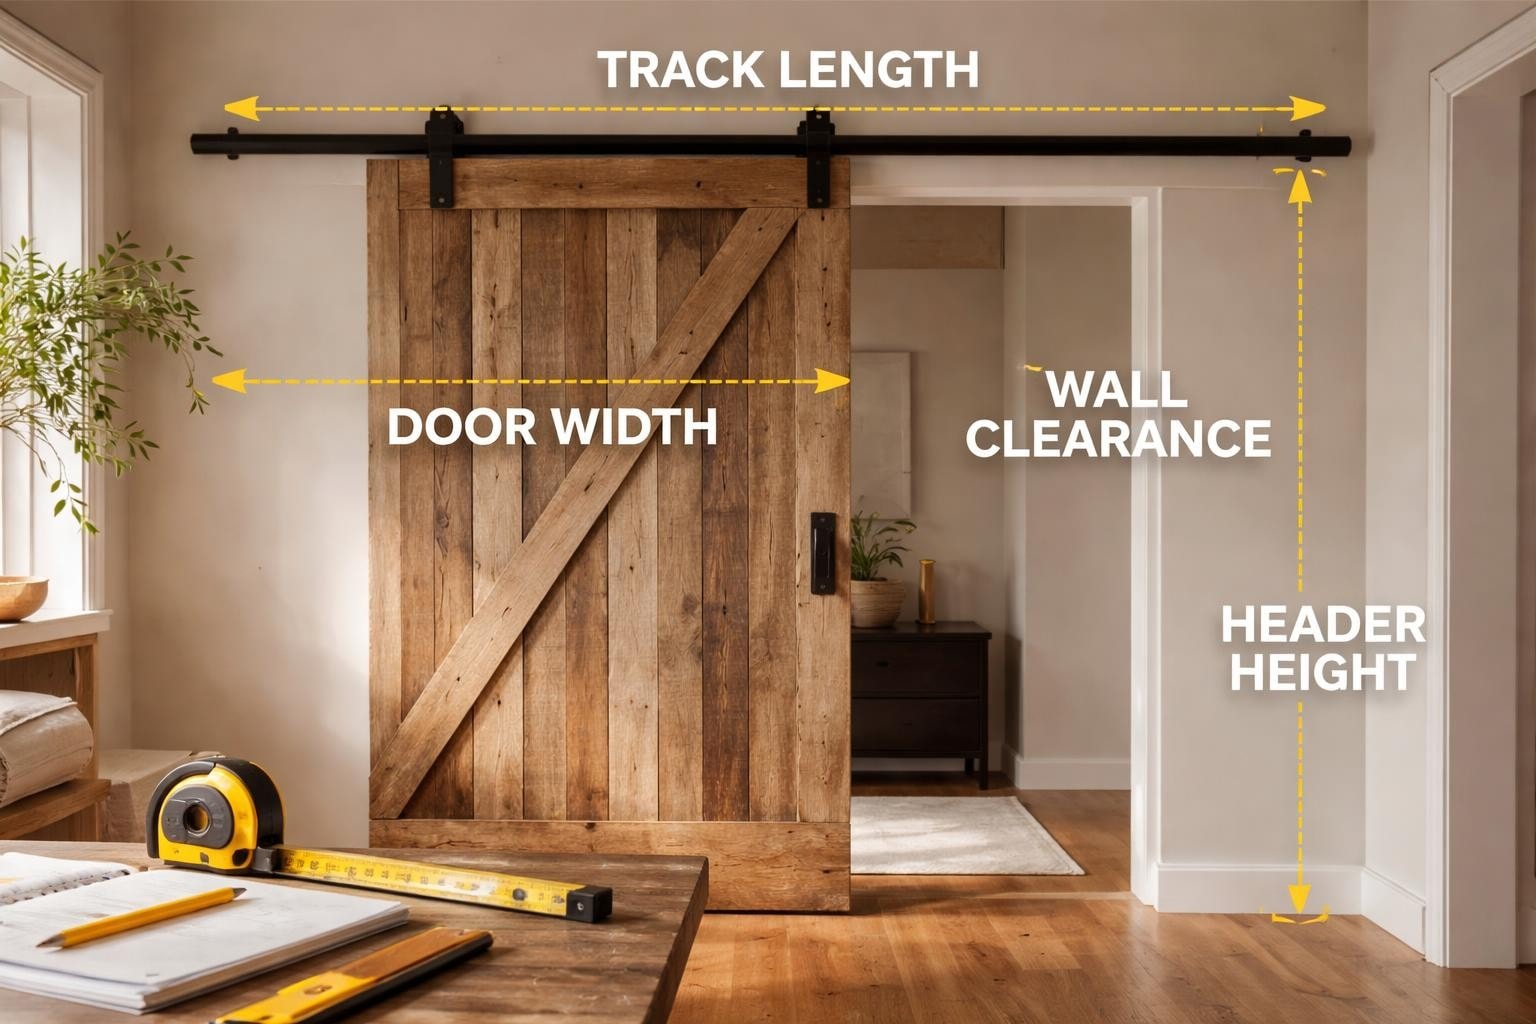
Measuring Your Door Opening: The Foundation
Start by measuring the actual doorway opening-not the door itself if you're replacing an existing one. This is where many people make their first mistake.
Width Measurements
Grab your tape measure and record the width of your door opening at three points: top, middle, and bottom. Why three measurements? Because walls aren't always perfectly straight, and you need to know the widest point.
Your barn door should be wider than the opening. Here's the standard formula:
- Add 2-4 inches to each side of your opening width
- For a 36-inch opening, your door should be 40-44 inches wide minimum
- This overlap ensures privacy and blocks light from seeping through
As Masonite's measuring guide points out, adequate overlap is essential for both aesthetics and function. A door that's too narrow creates visible gaps and defeats the purpose of having a door at all.
Let me share a real example: My neighbor wanted to install a barn door for her laundry room, which had a 32-inch opening. She initially thought a 32-inch door would work, but after learning how to measure for barn door hardware properly, she went with a 38-inch door. The extra width eliminated the light gaps and gave the installation a much more polished look.
Height Measurements
Measure from the floor to the top of your door opening. Then decide how much floor clearance you want.
| Clearance Type | Gap Size | Best For |
|---|---|---|
| Standard | 1/2 to 3/4 inch | Most interior doors, smooth floors |
| Carpet | 1 to 1.5 inches | Rooms with thick carpeting |
| Minimal | 1/4 to 1/2 inch | Contemporary look, hard floors |
Add your desired door height to the clearance gap. For instance, if your opening is 80 inches and you want 1/2-inch clearance, your door should be 80.5 inches tall. Most people round up to 81 inches for easier ordering.
Calculating Track Length: More Than Just Door Width
Here's where understanding how to measure for barn door hardware gets interesting. Your track needs to be significantly longer than your door width-this is the measurement that surprises most first-timers.
The Track Formula
Track length = (Door width × 2) + 4 to 6 inches
For a 40-inch wide door, you'd need a track that's 84-86 inches long. This allows the door to slide completely past the opening without any obstruction.
Doors and Beyond's measurement guide emphasizes this critical calculation because an undersized track prevents your door from opening fully. I've seen homeowners order tracks that matched their door width, only to realize the door could only slide halfway open.
Important considerations for track length:
- Wall space availability (more on this below)
- Whether you're installing a single or double door system
- Obstacles like light switches or wall art
- The direction you want the door to slide
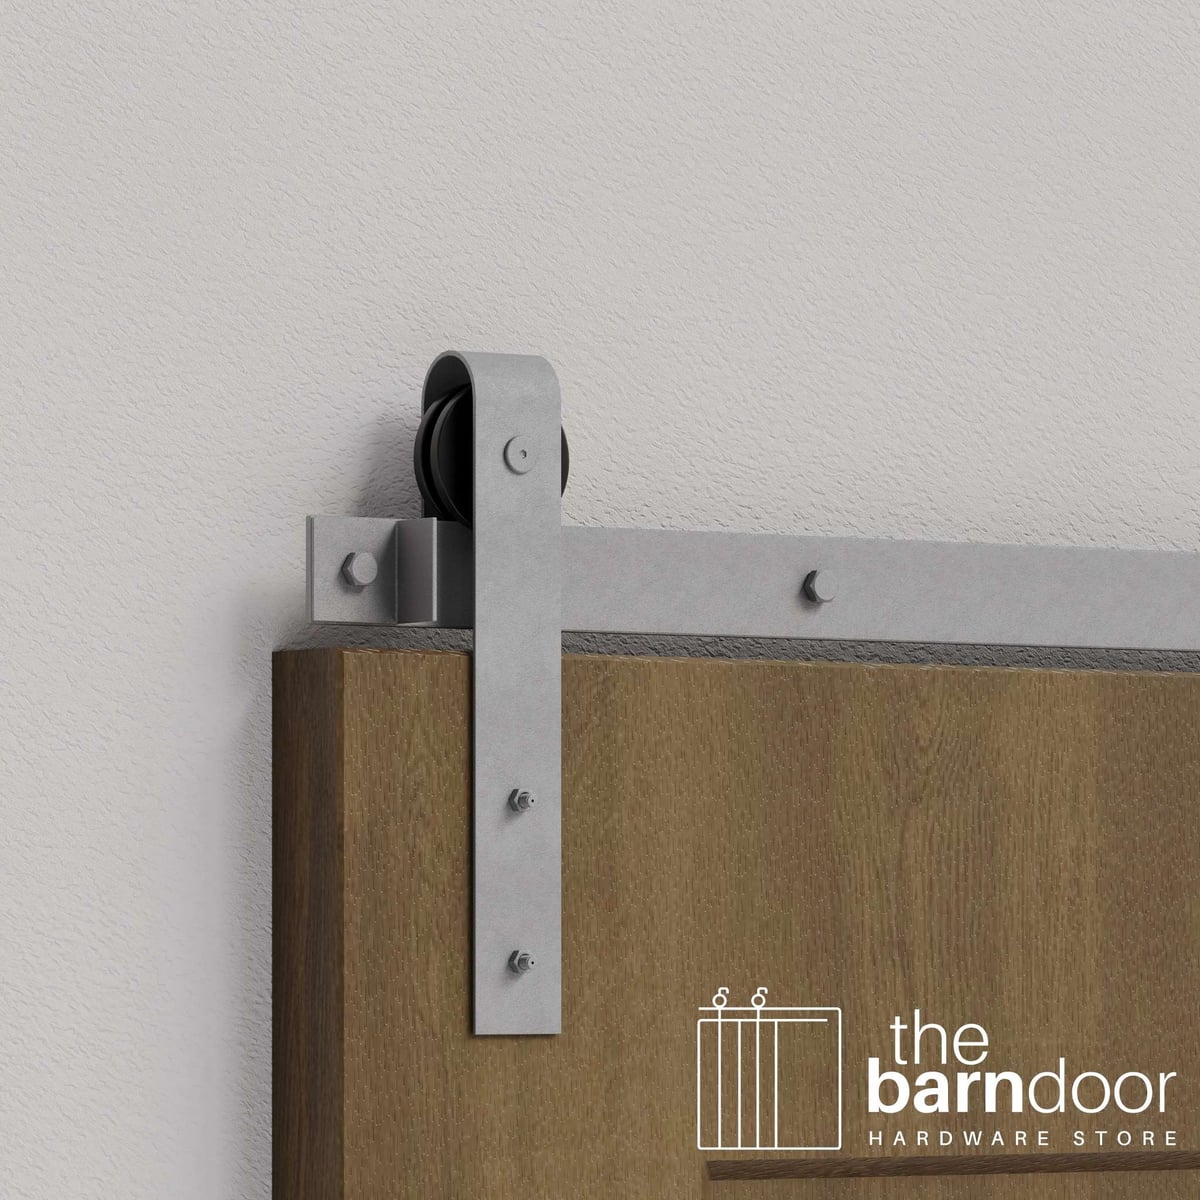
The Classic J-Strap Barn Door Hardware Kit works beautifully for standard single-door installations and can support doors up to 200 pounds with its traditional curved design. This American-made hardware handles doors between 1-3/8" and 1-3/4" thick, making it compatible with most standard door panels.
Wall Space and Clearance Requirements
You might have the perfect door and the right track length, but if you don't have adequate wall space, your installation won't work. This is the measurement phase where you need to think three-dimensionally.
Horizontal Wall Space
Measure the clear wall space on one or both sides of your opening (depending on which way you want the door to slide). You need:
- Minimum: The full width of your door
- Ideal: Door width plus 6 inches for visual balance
For example, if your door is 42 inches wide, you need at least 42 inches of unobstructed wall space. If you have 48 inches, even better-the door won't crowd the edge of the wall.
What counts as "obstructed" space? Light switches, outlets, thermostats, existing artwork, or architectural features like corners and columns. Mark these on a simple sketch as you measure.
Vertical Clearance Above the Opening
This is where learning how to measure for barn door hardware gets technical. You need space above your door opening for:
- The mounting board or header
- The track itself
- The roller hardware
- Clearance for the door to hang
Standard vertical requirements:
- 6 to 8 inches minimum above the door opening
- 10 to 12 inches for optimal installation flexibility
- Additional space if you have crown molding or trim
According to SafetyWish's hardware measuring guide, this vertical clearance is often underestimated. If your ceiling is exactly 8 feet and your door opening is 80 inches tall, you might only have 16 inches of clearance-which works, but leaves little room for adjustment.
A client I worked with last year had 9-foot ceilings and assumed she had plenty of clearance. But she had decorative crown molding that came down 4 inches, reducing her usable space significantly. We had to adjust her door height to accommodate the molding.
Door Thickness and Weight: The Often-Forgotten Measurements
Your door's physical characteristics determine which hardware you can use. Not all barn door kits support all door types.
Measuring Door Thickness
Use your tape measure or calipers to measure the door thickness at several points. Standard interior doors typically fall into these categories:
| Door Type | Thickness Range | Common Uses |
|---|---|---|
| Standard hollow-core | 1-3/8 inches | Bedrooms, closets, lightweight applications |
| Solid-core interior | 1-3/4 inches | Bathrooms, offices, better sound dampening |
| Custom solid wood | 1-3/4 to 2 inches | Statement pieces, rustic designs |
Make sure your chosen hardware accommodates your door thickness. Most standard hardware kits work with doors between 1-3/8" and 1-3/4", but always verify before ordering.
Calculating Door Weight
This measurement often gets overlooked when people learn how to measure for barn door hardware, but it's crucial for selecting the right system.
Estimating door weight:
- Hollow-core doors: 25-35 pounds
- Solid-core doors: 50-75 pounds
- Solid wood doors: 75-150+ pounds depending on size and wood type
If you're repurposing an existing door, you can weigh it using a bathroom scale. Stand on the scale holding the door, then subtract your weight. For doors you're ordering, check the manufacturer's specifications.
Most standard barn door hardware supports doors up to 200 pounds, but heavy-duty kits are available for larger installations. Don't assume "close enough" on weight capacity-undersized hardware will fail prematurely and create safety hazards.
Double Door and Bypass Configurations
If you're installing double barn doors or a bypass system, the measuring process becomes more complex but follows the same principles.
Double Barn Door Measurements
For two doors meeting in the middle:
- Measure your opening width
- Add 2 inches overlap per door (4 inches total)
- Divide by 2 for individual door width
- Track length = opening width + both door widths
For a 60-inch opening with two doors: Each door should be 31 inches wide (60 + 4 = 64 ÷ 2), and your track should be approximately 122 inches long.
This installation resource provides helpful visuals for double door configurations that complement the measurement process.
Bypass System Considerations
Bypass systems (where one door slides in front of another) require:
- Two parallel tracks
- Spacers between tracks
- Additional vertical clearance for the dual-track system
- Different roller configurations
For bypass installations, consult specific track setup guides to understand the unique spacing requirements.
Creating Your Measurement Checklist
Now that you understand how to measure for barn door hardware, let's put it all together into a practical checklist you can use.
Your complete measurement list:
- Door opening width (measure at top, middle, bottom-use the largest)
- Door opening height (floor to top of opening)
- Desired door width (opening width + 4-6 inches)
- Desired door height (opening height + floor clearance)
- Available wall space (left and/or right of opening)
- Vertical clearance above opening (floor to ceiling minus door height)
- Track length needed (door width × 2 + 4-6 inches)
- Door thickness (at multiple points)
- Door weight (actual or estimated)
- Locations of obstacles (switches, outlets, trim, molding)
Write these down before you start shopping. Having concrete numbers prevents ordering mistakes and helps you compare different hardware options effectively.
The D&D Hardware measuring guide reinforces the importance of this systematic approach, noting that professional installers never skip this documentation step.
Common Measurement Mistakes to Avoid
After helping dozens of people through barn door installations, I've noticed the same errors keep appearing. Here's what to watch out for.
Measurement mistakes that cause problems:
- Assuming walls are plumb: Measure in multiple locations because walls shift and settle
- Forgetting about baseboards: They extend beyond the wall and can interfere with door swing
- Ignoring door weight: Lightweight hardware fails under heavy solid wood doors
- Measuring existing trim instead of rough opening: Trim dimensions aren't accurate for new installations
- Not accounting for floor unevenness: Can affect your floor clearance calculations
One homeowner I know measured everything perfectly except he forgot about his floor transition strip between rooms. His door caught on it every time it slid open. A simple 1/4-inch adjustment to his door height would have prevented the issue.
Another common mistake? Ordering a track based on door width instead of calculating the full sliding clearance needed. This video tutorial demonstrates the proper technique for measuring your opening to avoid this exact problem.
Tools You Need for Accurate Measuring
You don't need a contractor's toolkit to learn how to measure for barn door hardware successfully. Here's what actually helps:
Essential Tools
- 25-foot tape measure: Long enough for track measurements
- Level: Ensures your measurements account for uneven floors
- Notepad or smartphone: Document everything immediately
- Pencil: Mark measurements directly on walls if helpful
- Stud finder: Locate studs where your track will mount
Optional but Helpful
- Laser measure: Faster and more accurate for long distances
- Square: Check corner angles and door squareness
- Ladder or step stool: Access ceiling height measurements safely
- Camera: Photograph your space with measurements visible for reference
I keep a dedicated notebook for home projects where I sketch the space and write measurements directly on the drawing. It's old-school, but it prevents the confusion that comes from having numbers scattered across multiple scraps of paper.
Special Situations and Adaptations
Some installations require modified approaches when you measure for barn door hardware. Let's address the scenarios that don't fit standard guidelines.
Low Ceilings
If you have 7-foot ceilings or less:
- Consider shorter doors (72-75 inches instead of 80+)
- Use minimal-clearance hardware systems
- Reduce vertical spacing where possible
- Explore top-mount hardware options that save vertical space
Angled or Vaulted Ceilings
Sloped ceilings complicate standard installations:
- Measure ceiling height at both ends of where your track will mount
- Use the lower measurement as your maximum
- Level your track-don't follow the ceiling angle
- Ensure adequate clearance at the lowest point
Tight Wall Spaces
When you don't have double the door width available:
- Consider a bifold barn door system that folds as it slides
- Use a bypass configuration where doors overlap
- Install on a corner with an L-shaped track
- Explore pocket door alternatives if wall space is severely limited
This measuring video from Steves & Sons offers additional tips for challenging spaces that can help you adapt the standard measuring process.
Finalizing Your Hardware Selection
Once you have accurate measurements, you can confidently select hardware that matches your needs. Here's how your measurements inform your choices:
Match measurements to hardware specifications:
| Your Measurement | What to Check in Hardware Specs |
|---|---|
| Door thickness | Compatible thickness range (typically 1-3/8" to 1-3/4") |
| Door weight | Weight capacity (standard vs. heavy-duty) |
| Track length | Available track sizes and extendability |
| Wall clearance | Installation depth and projection from wall |
| Ceiling height | Vertical clearance requirements for specific systems |
For modern spaces, you might prefer hidden roller systems that reduce visual bulk. For traditional farmhouse aesthetics, classic J-strap designs work beautifully. Your measurements determine which options are physically possible-your style preferences determine which you ultimately choose.
The family-owned team at The Barn Door Hardware Store can help you match your measurements to the right hardware kit, ensuring compatibility before you order.
Documenting Everything for Installation Day
Here's a pro tip that saves time later: Create a simple diagram of your space with all measurements labeled. Include:
- Opening dimensions
- Wall space dimensions
- Floor-to-ceiling height
- Stud locations
- Obstacle locations (switches, outlets, etc.)
- Desired track mounting height
- Floor clearance gap
This visual reference becomes invaluable during installation. You won't need to re-measure everything, and if you're working with a helper, they can reference your diagram without asking questions every five minutes.
I recommend taking this diagram one step further: Use painter's tape to mark where your track will mount and where your door will hang when open and closed. This physical mockup reveals issues your measurements might miss-like discovering your door will block artwork you want to keep, or realizing the door swing interferes with furniture placement.
When to Call for Professional Help
Learning how to measure for barn door hardware is absolutely doable for DIYers, but some situations benefit from professional assessment:
Consider professional measuring when:
- Installing over arched or irregular openings
- Working with historic homes with non-standard dimensions
- Planning complex multi-door systems
- Dealing with structural concerns (load-bearing walls, unusual framing)
- Installing exterior barn doors exposed to weather
Professional installers bring laser measuring tools and experience spotting potential issues. They can often identify problems in minutes that might take you hours to discover.
That said, most standard interior barn door installations are perfectly manageable for homeowners who take time to measure carefully. The key is being methodical and double-checking everything before ordering.
Beyond Basic Measurements: Planning the Complete Installation
Once you nail down how to measure for barn door hardware, think about these related planning elements:
Mounting Surface Preparation
- Is your wall sturdy enough for barn door hardware?
- Do you need to install a header board?
- Where are the studs for secure mounting?
- Will you need backing material for drywall installations?
Accessibility Considerations
- Can the door be operated from both sides easily?
- Is the handle placement comfortable for all users?
- Does the door swing interfere with traffic patterns?
Privacy and Sound
If you're installing in a bathroom or bedroom, measurements affect privacy. Larger overlaps block more light and sound. Consider reading about barn door privacy and soundproofing options to understand how door size impacts these factors.
Getting accurate measurements is the foundation of a successful barn door installation-it determines everything from hardware selection to final functionality. When you take time to measure properly, document thoroughly, and verify your calculations, you set yourself up for a smooth installation process and a barn door that operates flawlessly. Since 2016, The Barn Door Hardware Store has helped thousands of homeowners select the perfect hardware based on their specific measurements, offering expert guidance, American-made quality, and free shipping across the continental US to make your project a success.
